Authenticate to Azure IoT Hub
Prerequisites
Overview
X509 Certificates are the most secure way for IoT devices to authenticate with Azure. In this tutorial, we will show you how to use EZCA to connect your IoT devices to Azure in a secure and compliant way.
Video Version
Creating The Azure Resources
For this tutorial we only need an Azure IoT hub.
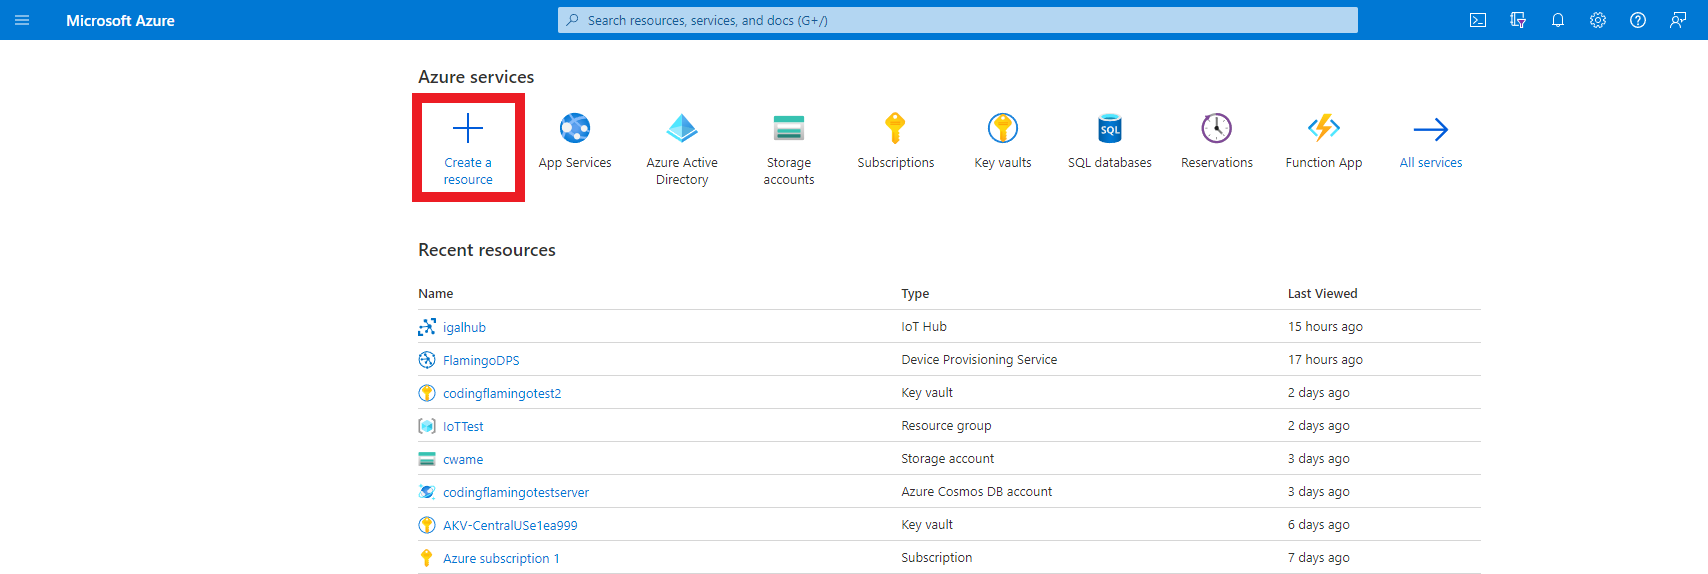
- First go to the Azure portal
- Click on create a resource.
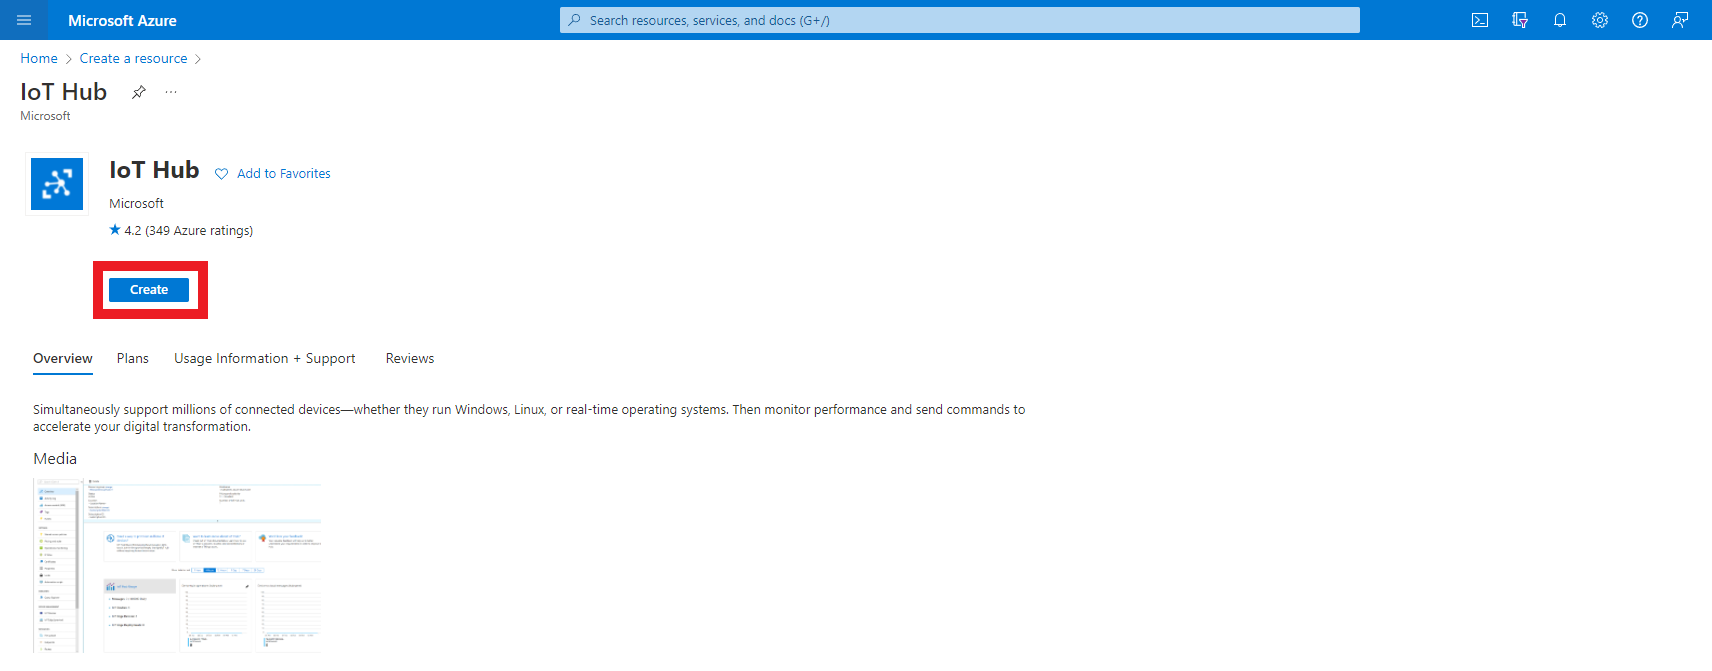
- Enter “IoT Hub” in the search bar and press enter.
- Click create.
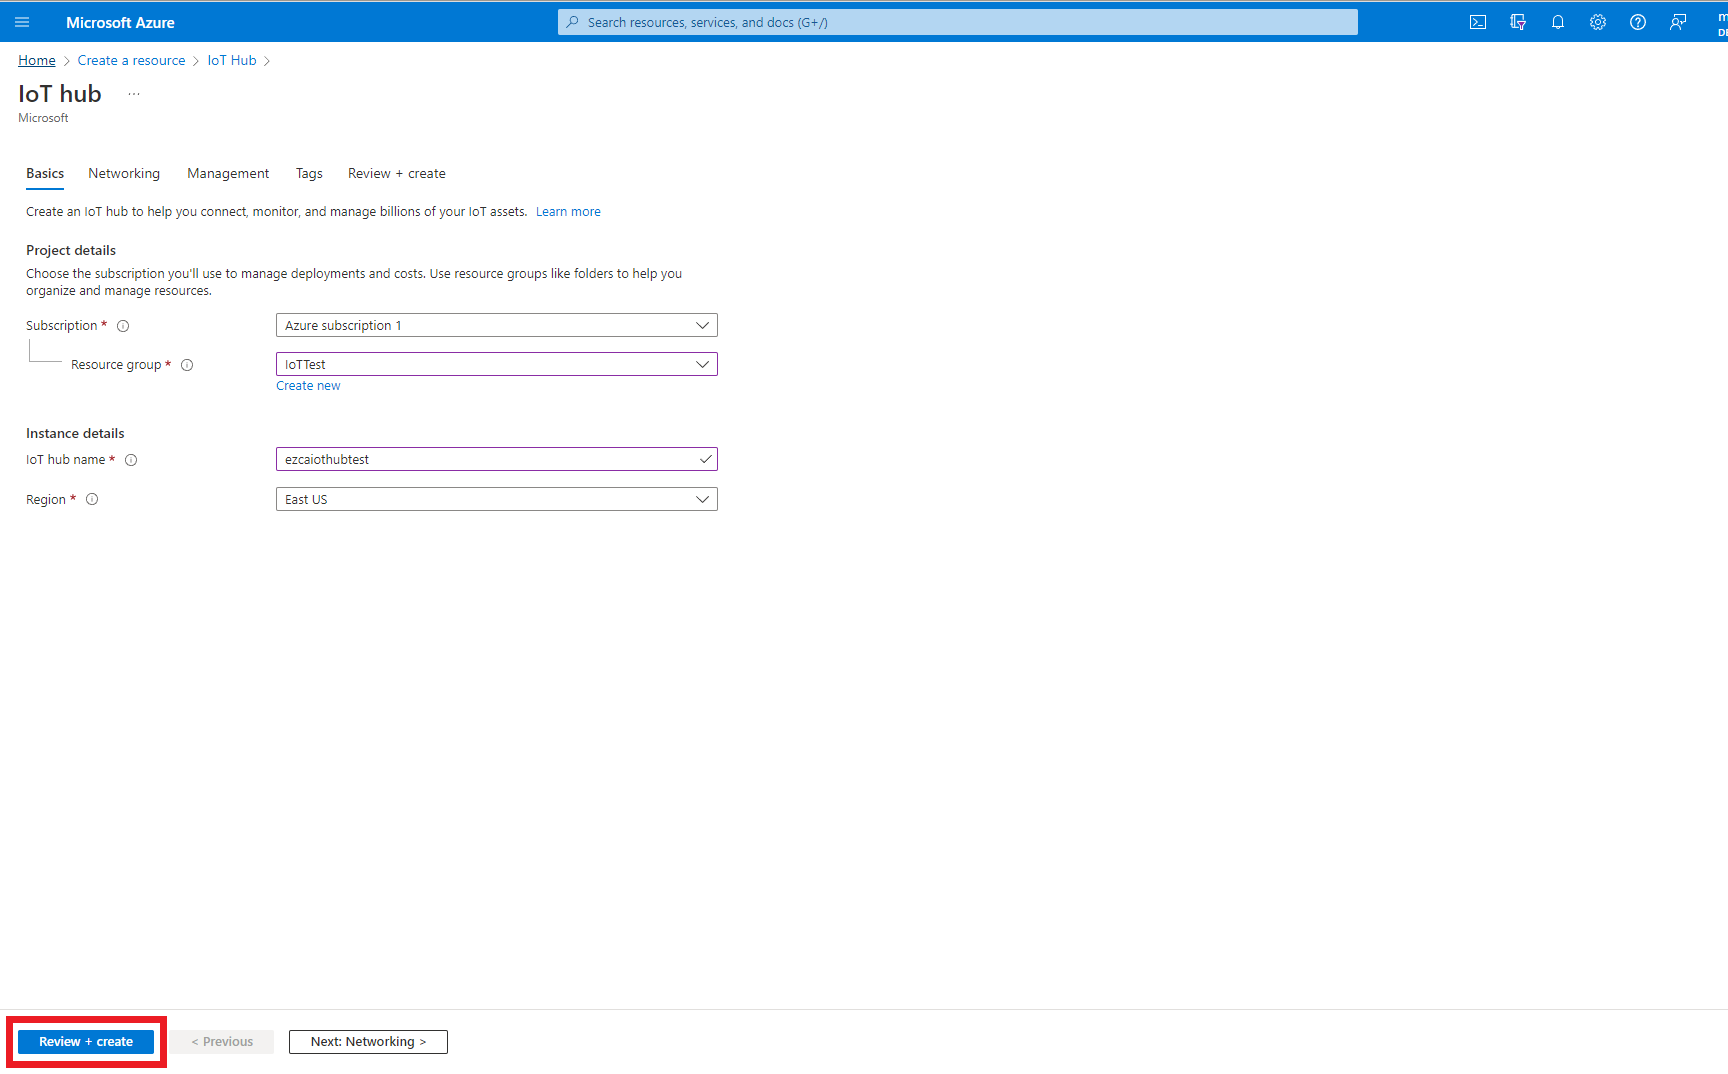
- Enter the resource group where you want to create this IoT hub.
- Enter a name for your IoT Hub.
- Click Review + Create
- Click Create
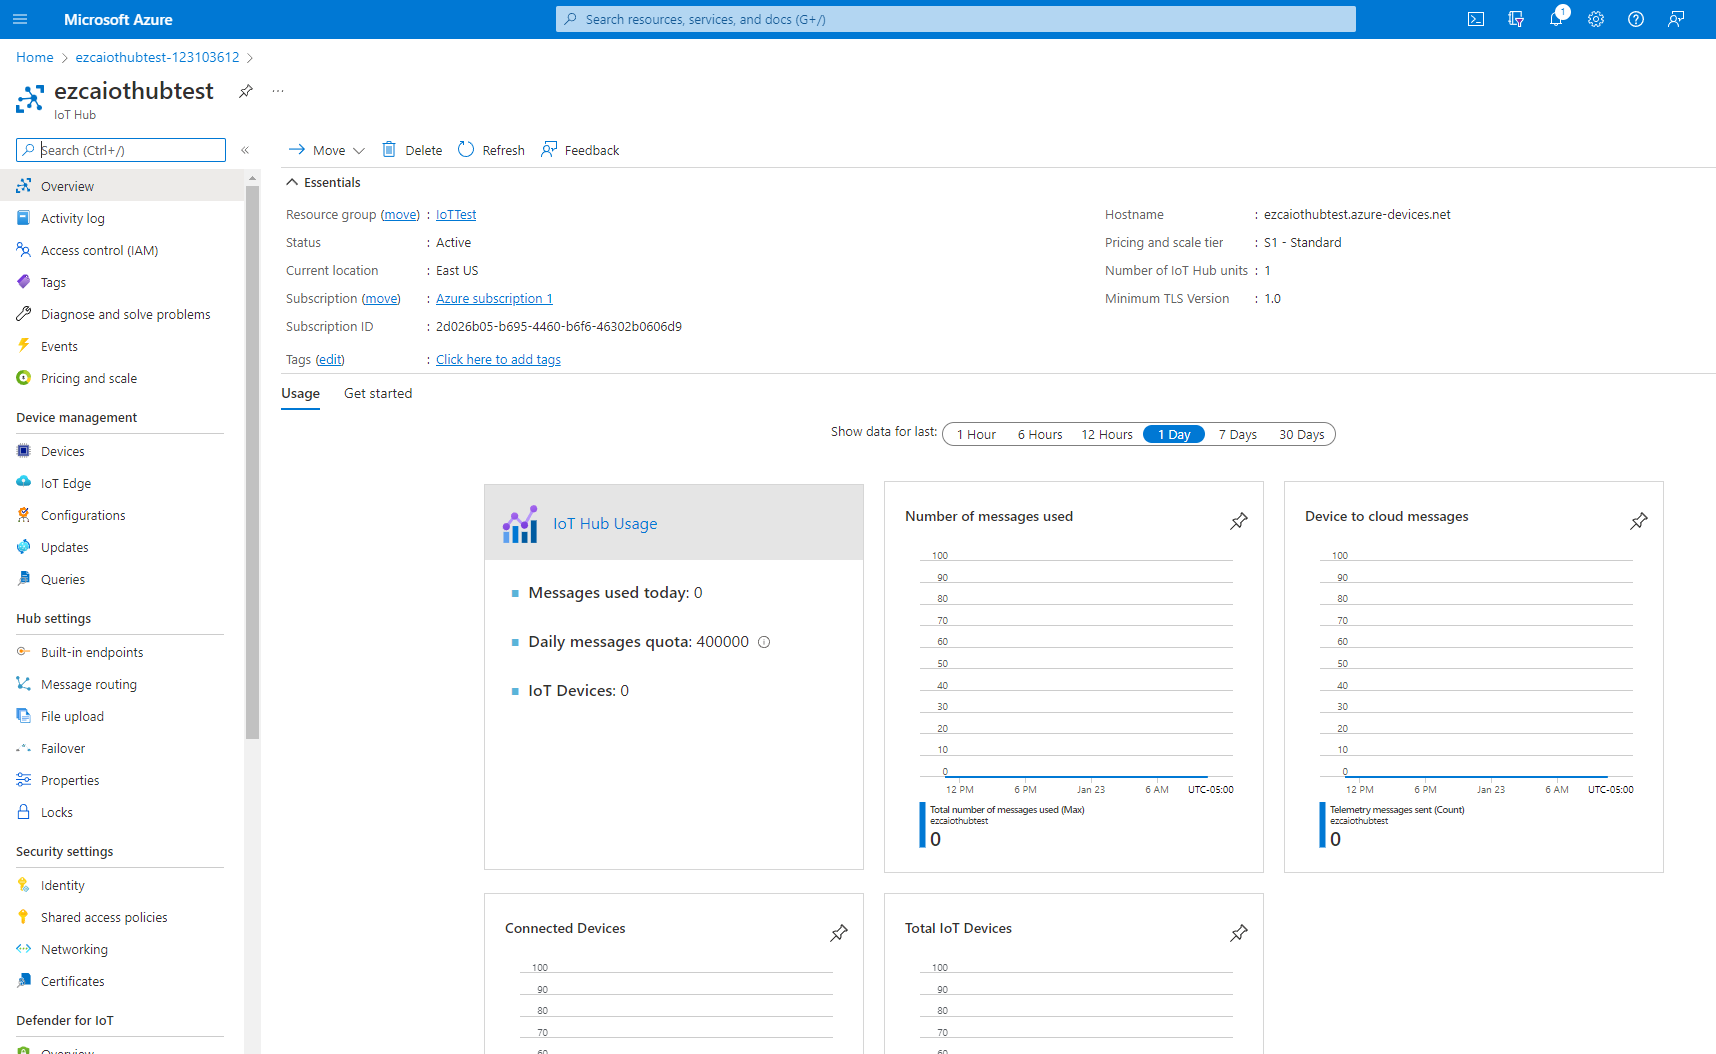
- Once the resource is created, go to your resource.
Establish Trust Between IoT Hub and Your EZCA CA
After creating the Azure resource, the next step is to establish a trust between Azure and our Certificate Authority. This trust tells Azure to trust any certificate issued by this Certificate Authority as a valid credential for this IoT Hub.
This can be done with our one click trust in the EZCA portal as well as manually in the Azure portal. First we will demonstrate how to do it with EZCA’s one click trust an then Manually in Azure.
Option A: EZCA One Click Trust
- Prerequisite: Connecting EZCA to your IoT Hub
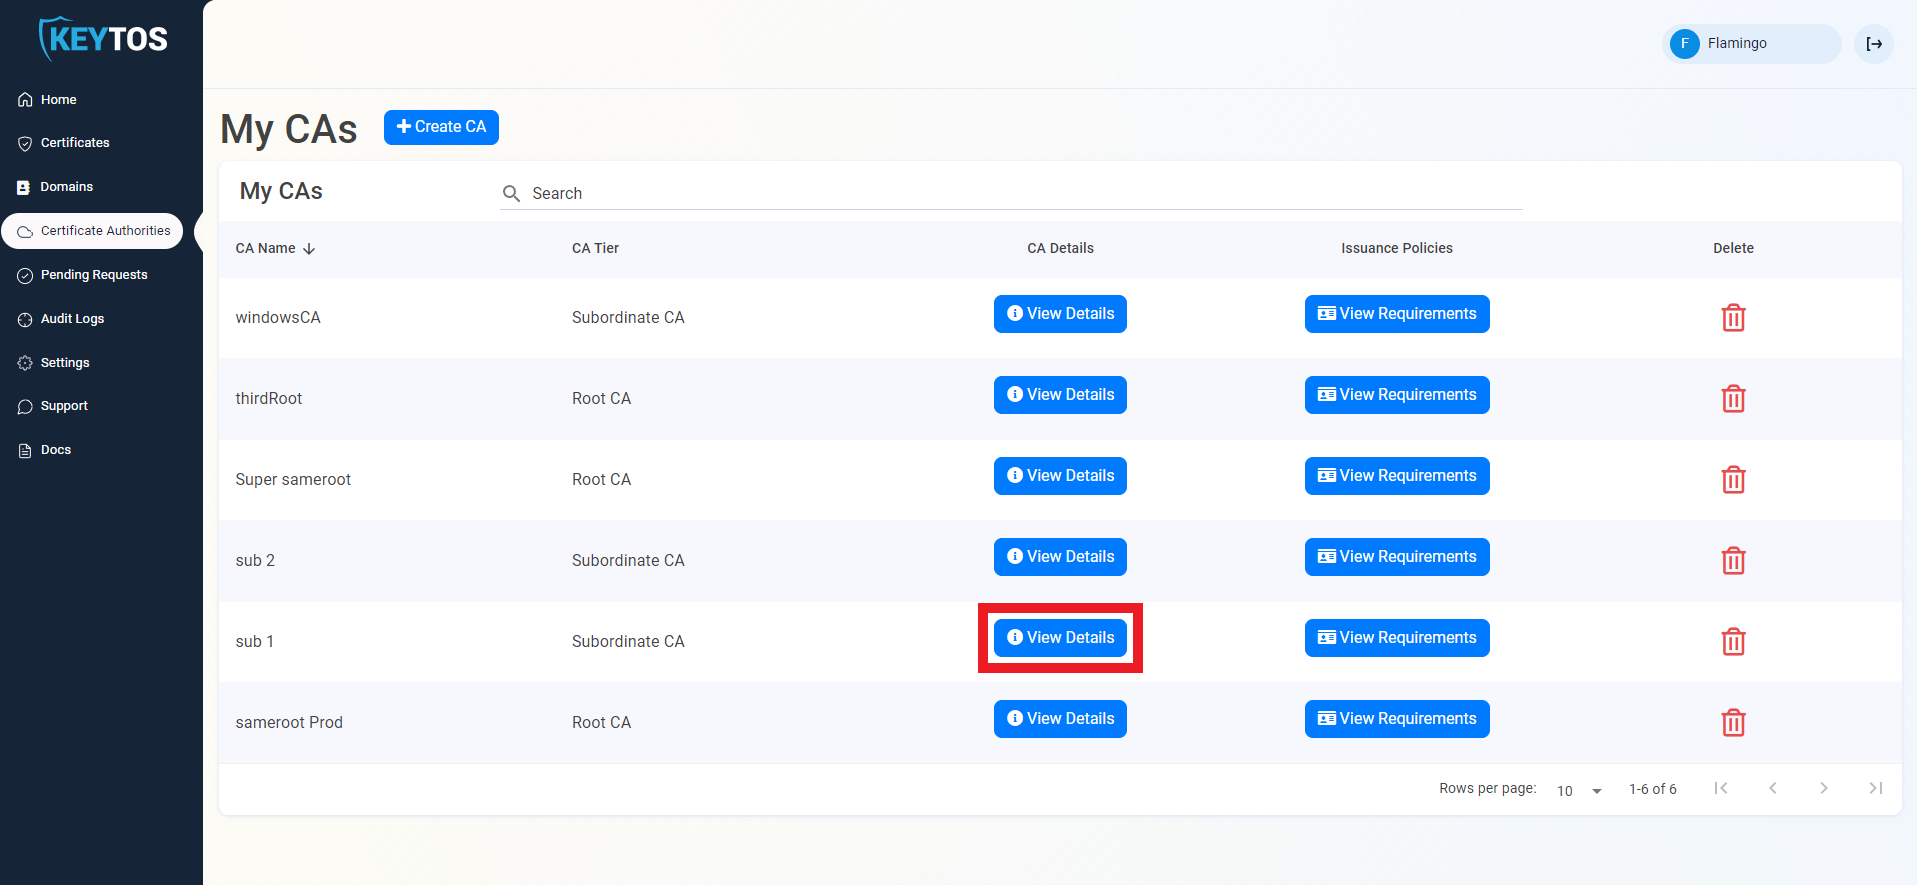
- In a new tab, go to the EZCA portal
- Navigate to the Certificate Authorities Page

- Press the “View Details” button on the CA you will use to issue certificates for your IoT devices.
- Scroll down to “CA Integrations”
- Select the Azure Subscription and IoT Hub you want to connect
- Click “Connect CA to IoT Hub”
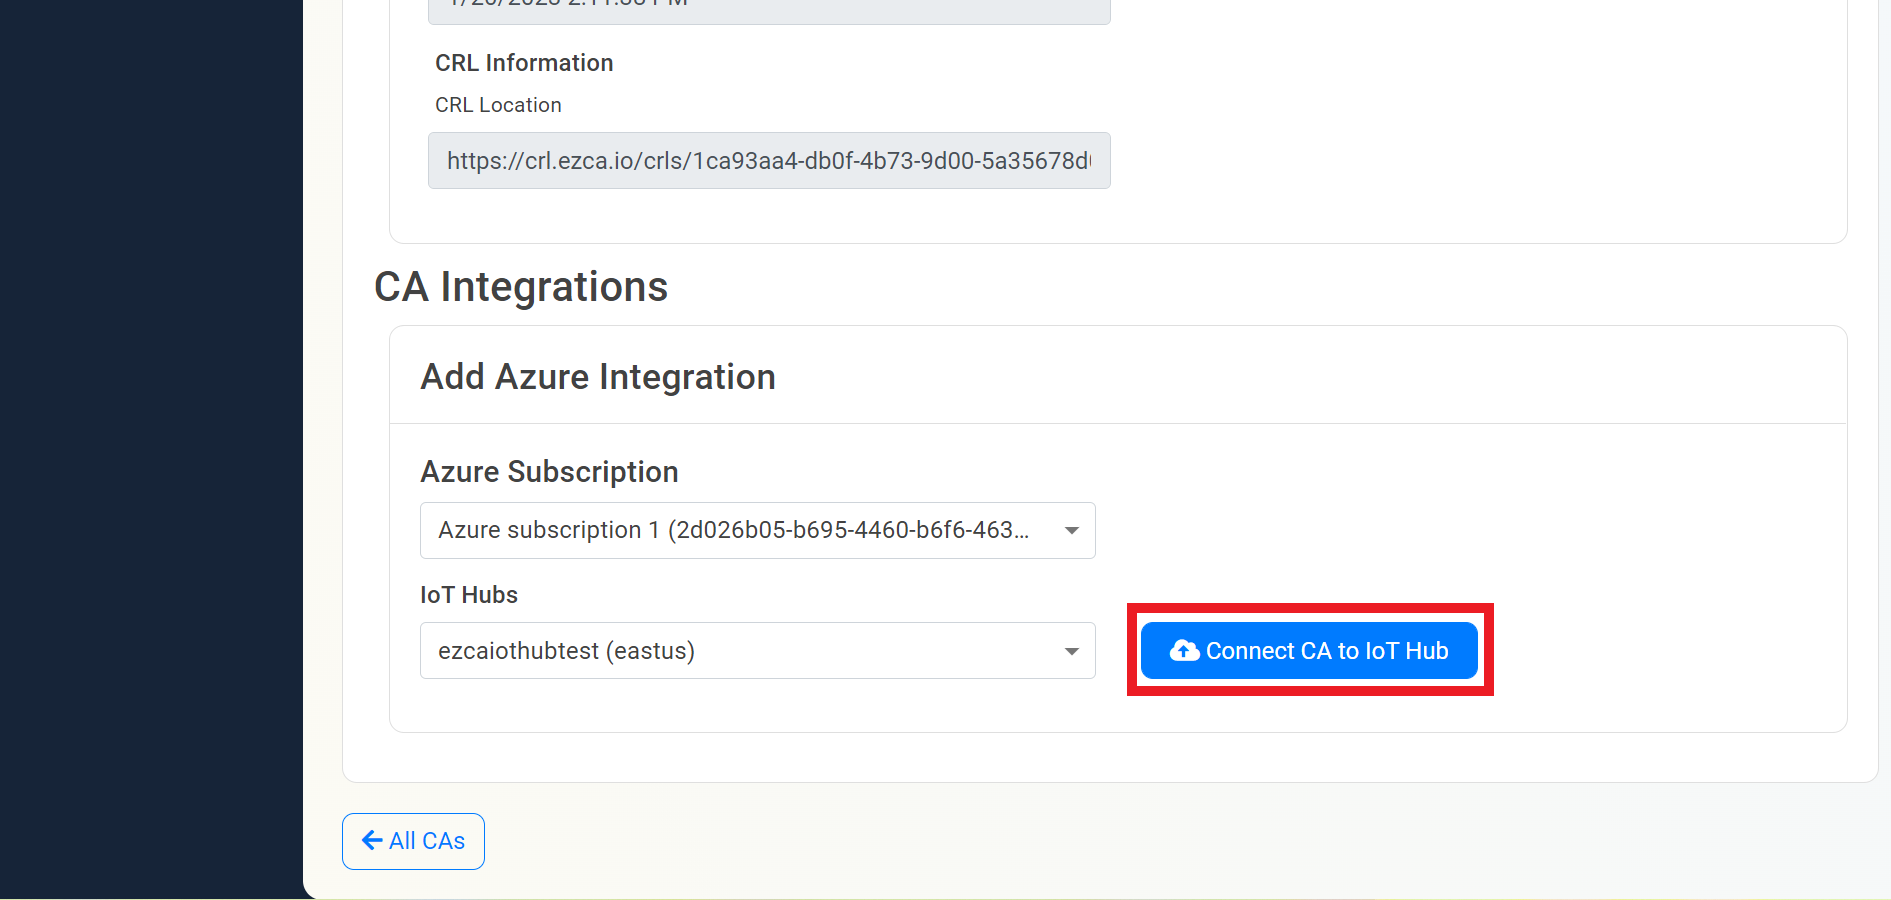
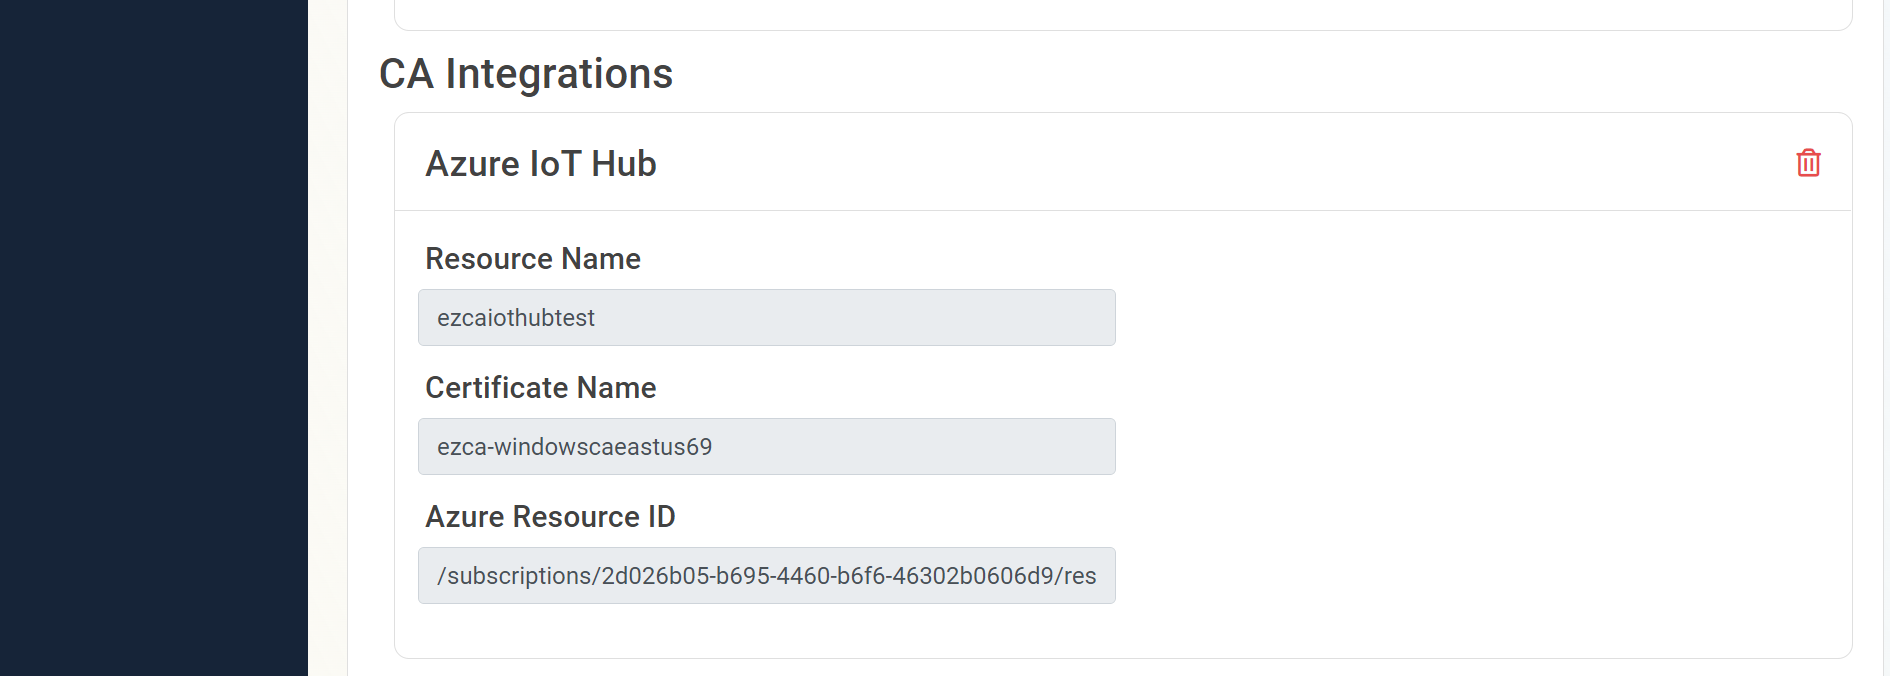
- EZCA will now add all the locations of that CA to IoT Hub and will automatically update the new CA certificates to Azure IoT hub when the CA is renewed.
Option B: Manually Create Trust in Azure
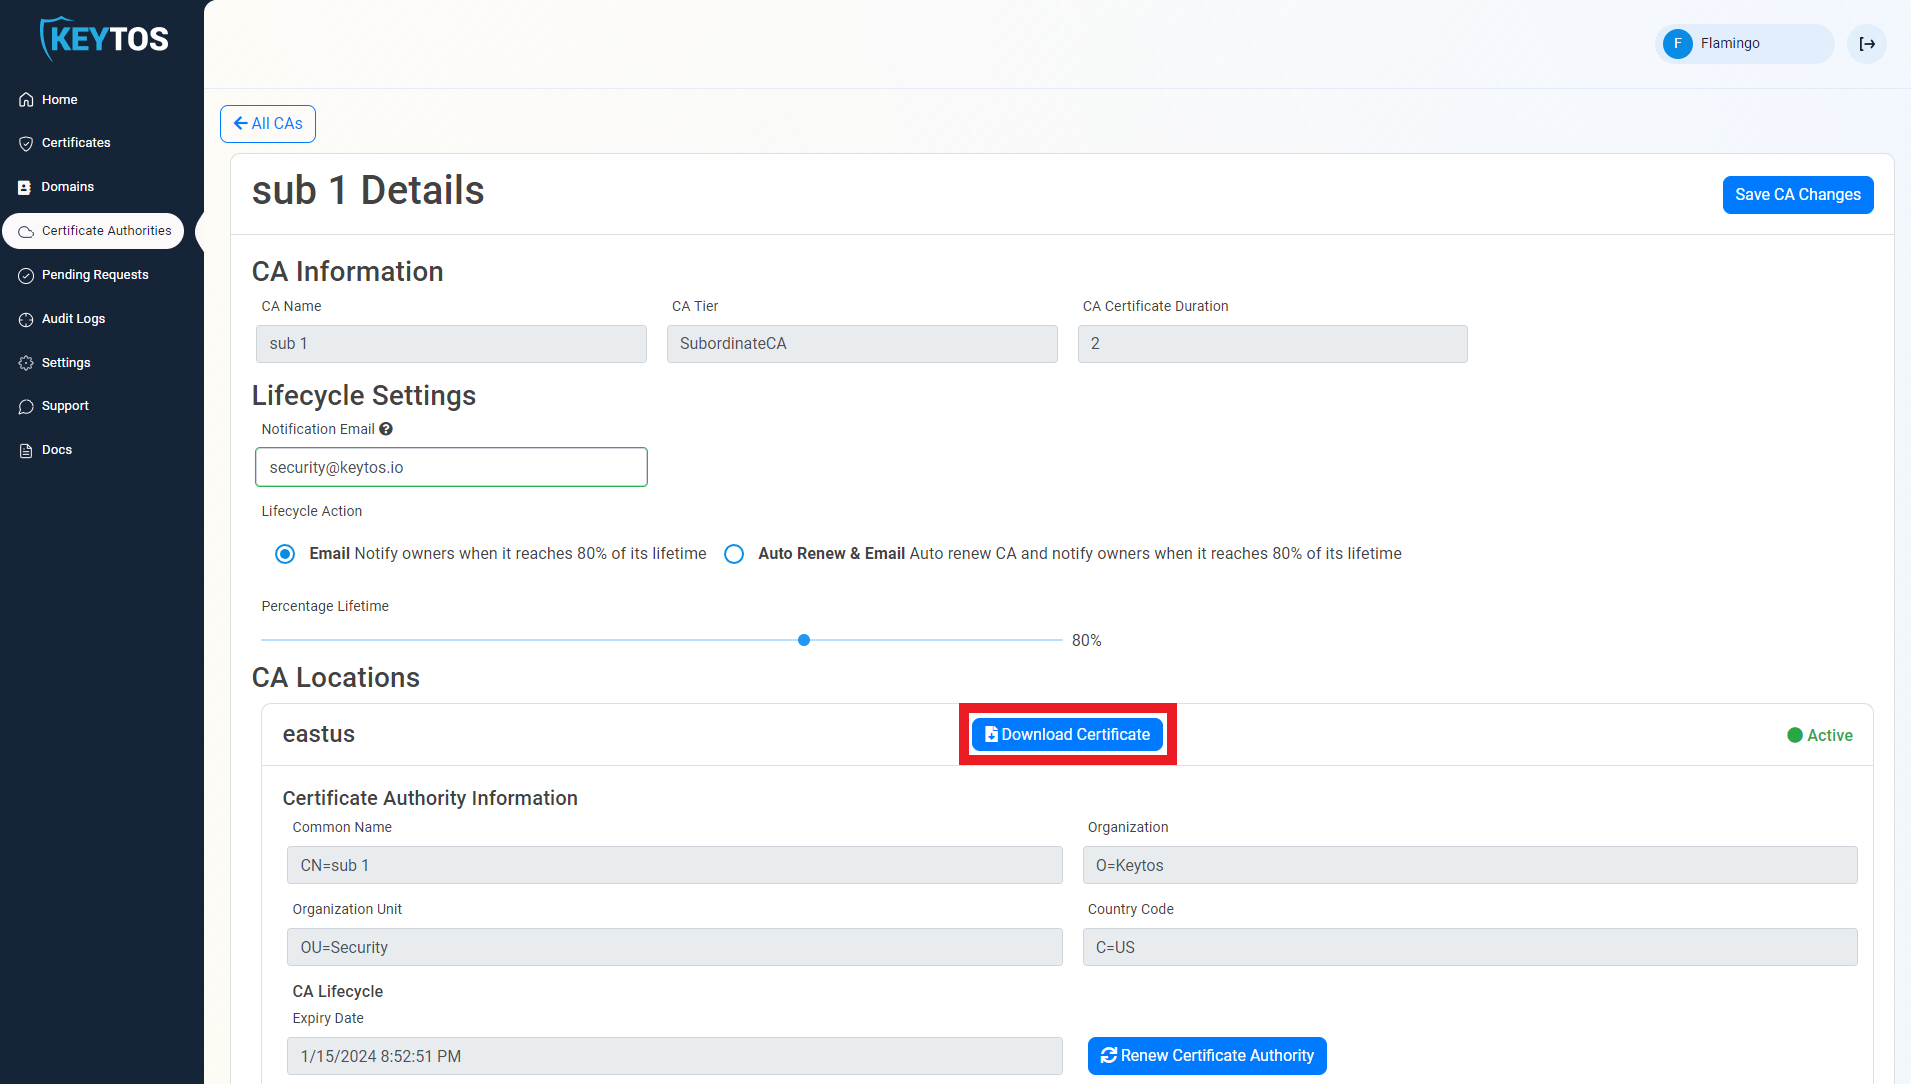
- In a new tab, go to the EZCA portal
- Navigate to the Certificate Authorities Page
- Press the “View Details” button on the CA you will use to issue certificates for your IoT devices.
- Press the “Download Certificate” button. This will download a copy of your CAs certificate.
- Once you have downloaded the certificate, go back to the Azure IoT Hub tab.
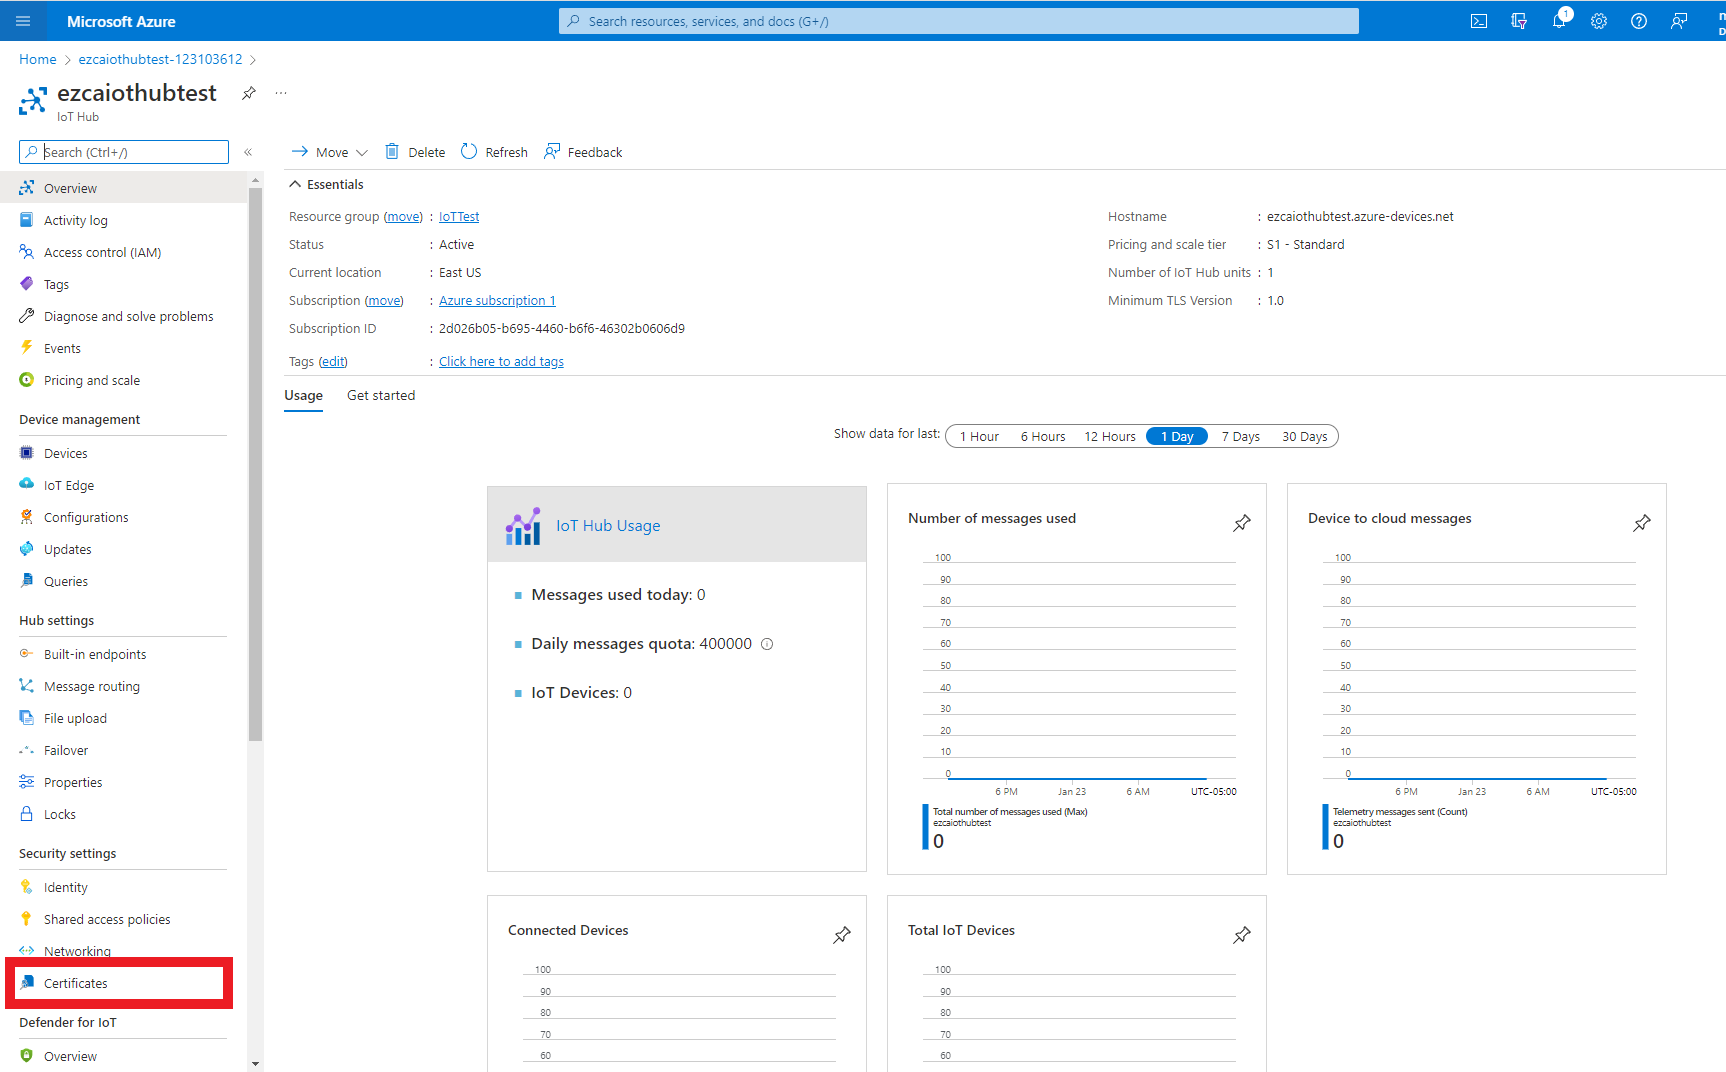
- Navigate to the Certificates page, under the Security Settings Menu.
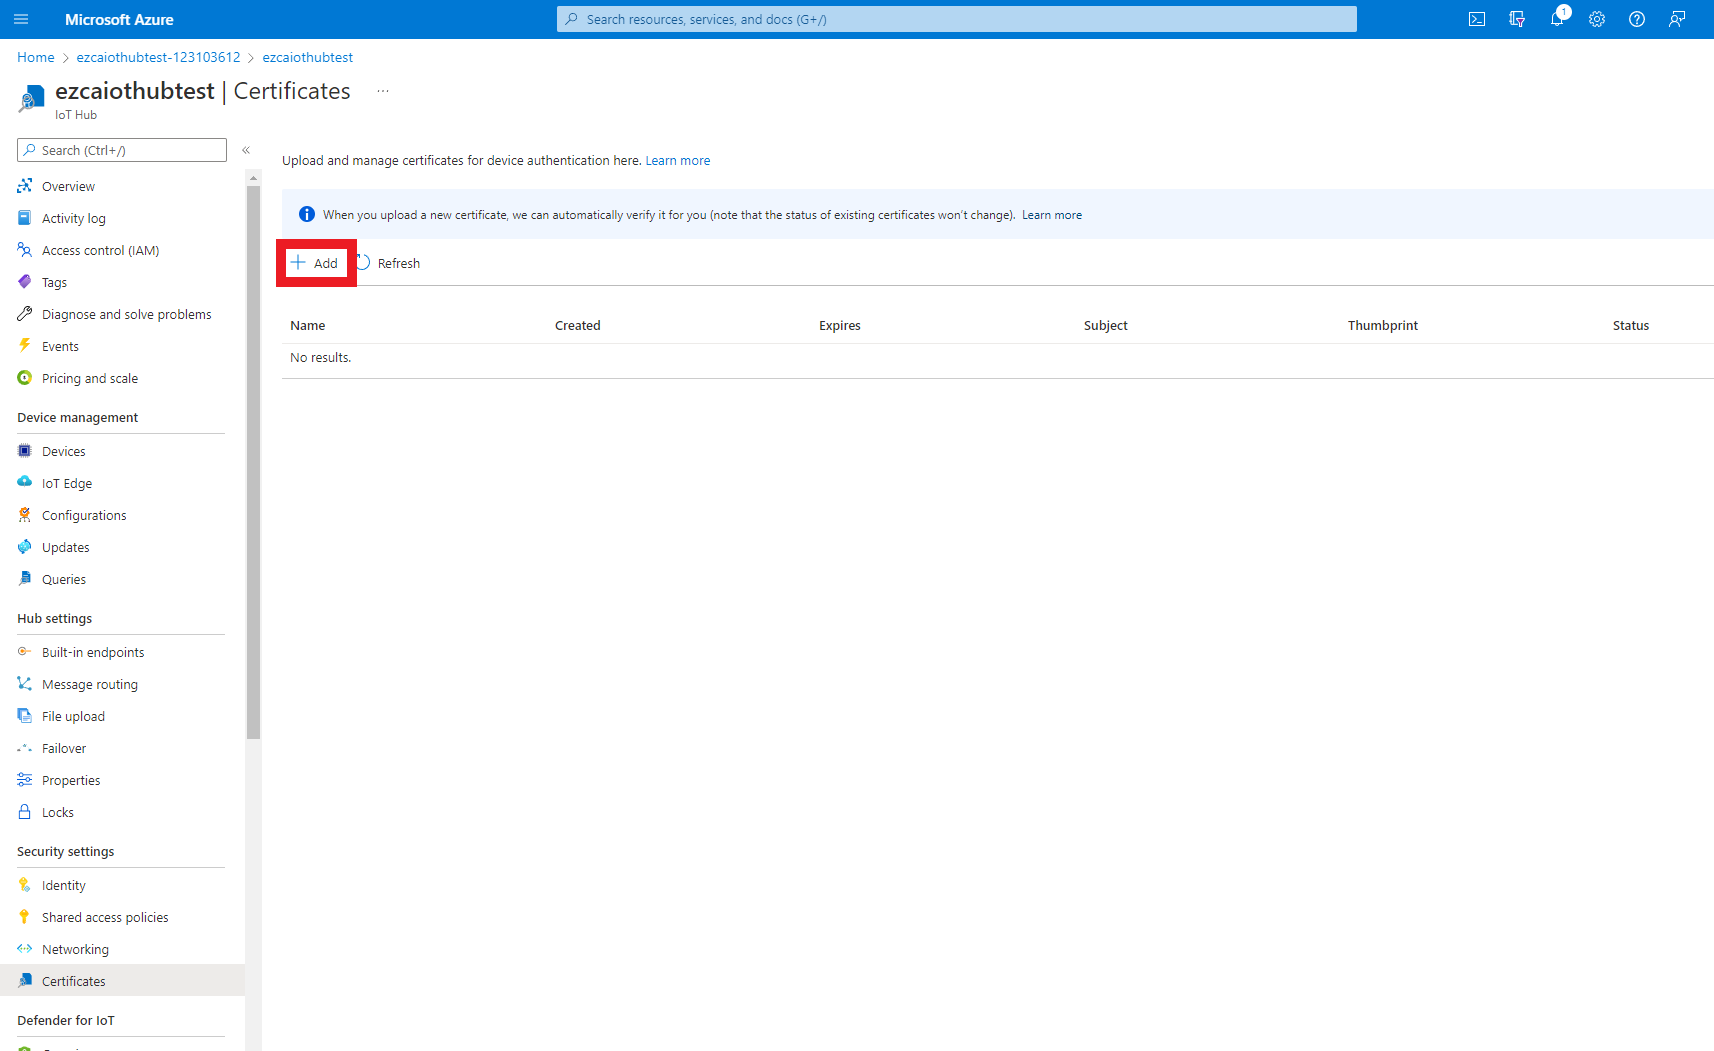
- Press the “Add” Button
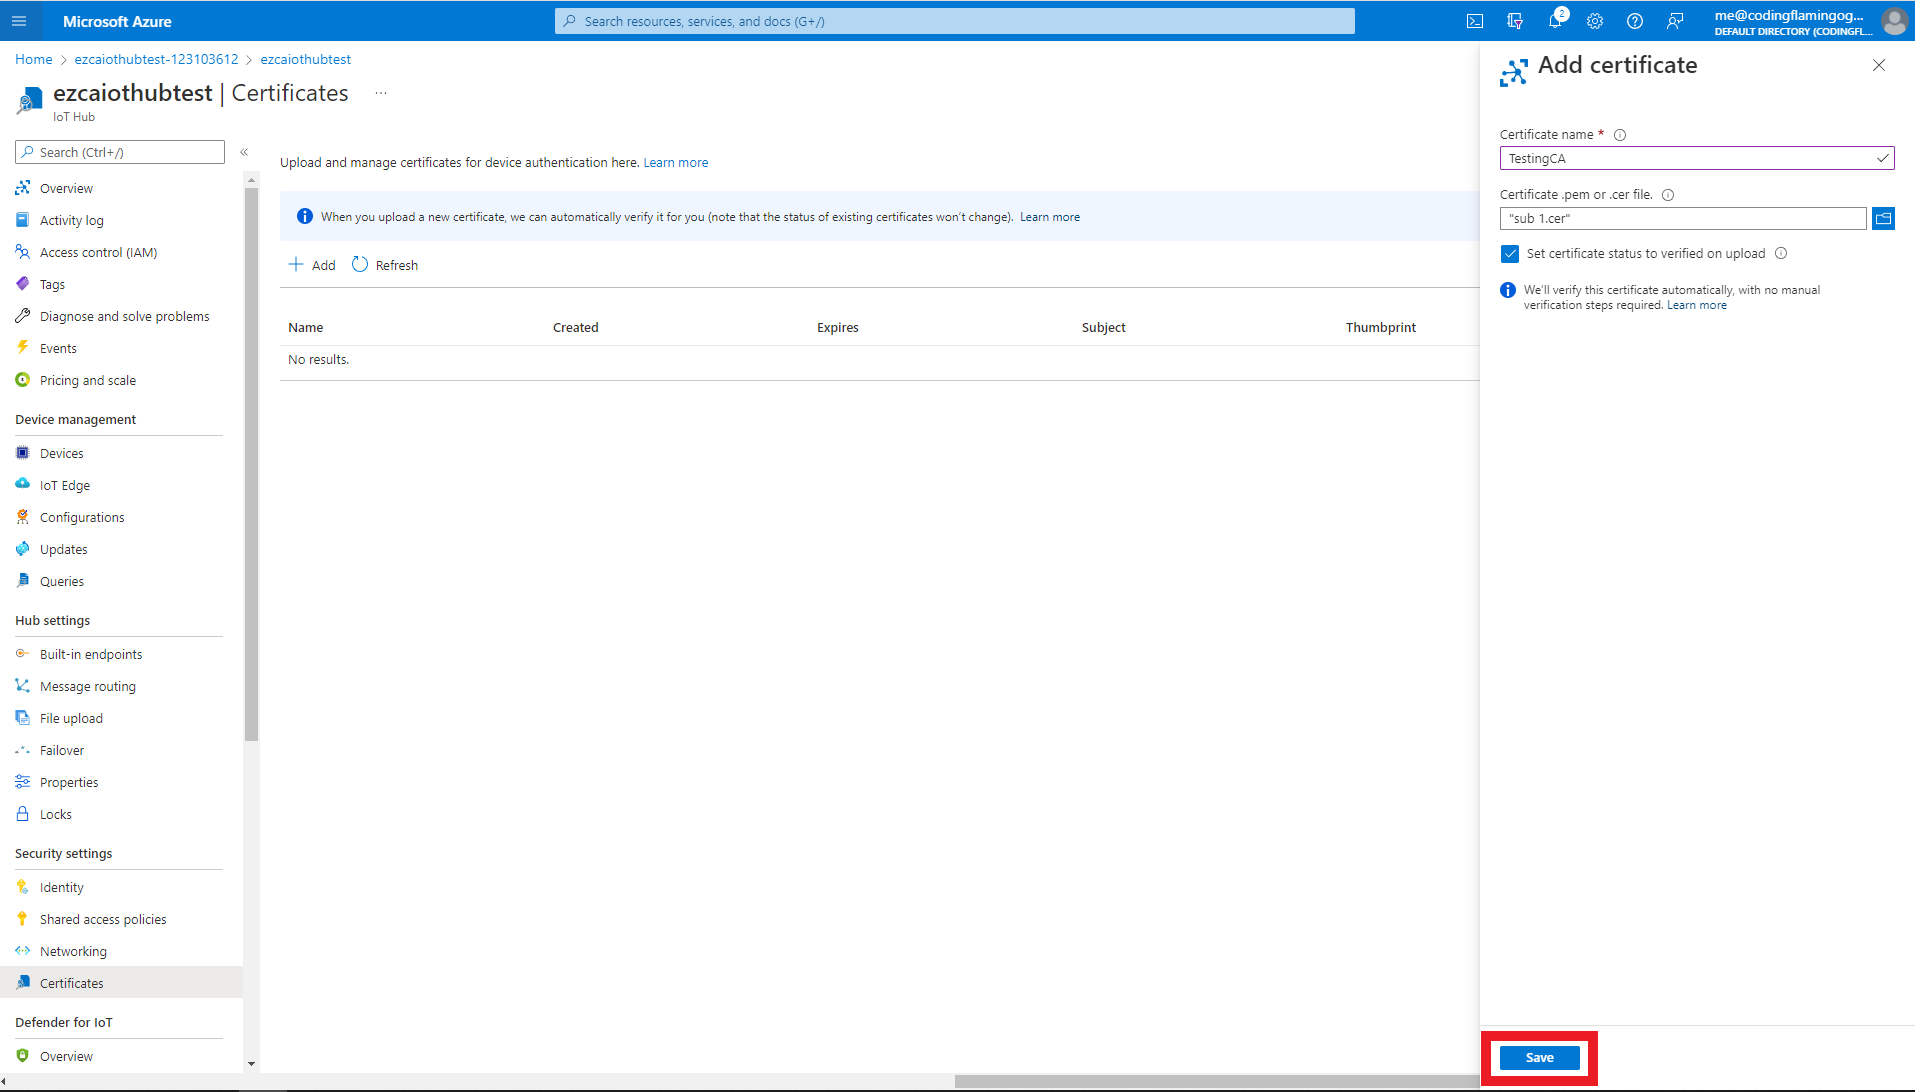
- Enter a name for you to recognize this CA in Azure.
- Upload the certificate you just downloaded from EZCA.
- Select the checkmark to set certificate status to verified (This attests that you can issue certificates from that CA).
- Press the “Save” button.
- This will add the CA as a trusted CA for Azure. You can repeat these steps with as many CAs you want to add. If you have multiple locations of the Same CA, you must add all the certificates for that specific CA.
Setting Up The Code Sample
Now that we have created our Azure IoT Hub and established trust with the EZCA CA, we will download a sample repository that will: register the domain in EZCA, create a certificate, use the certificate to authenticate to Azure. This sample is a great starting point to manually connect IoT devices to Azure. If you want to automatically add IoT devices to Azure, look at our guide using Azure’s Device Provisioning Service.
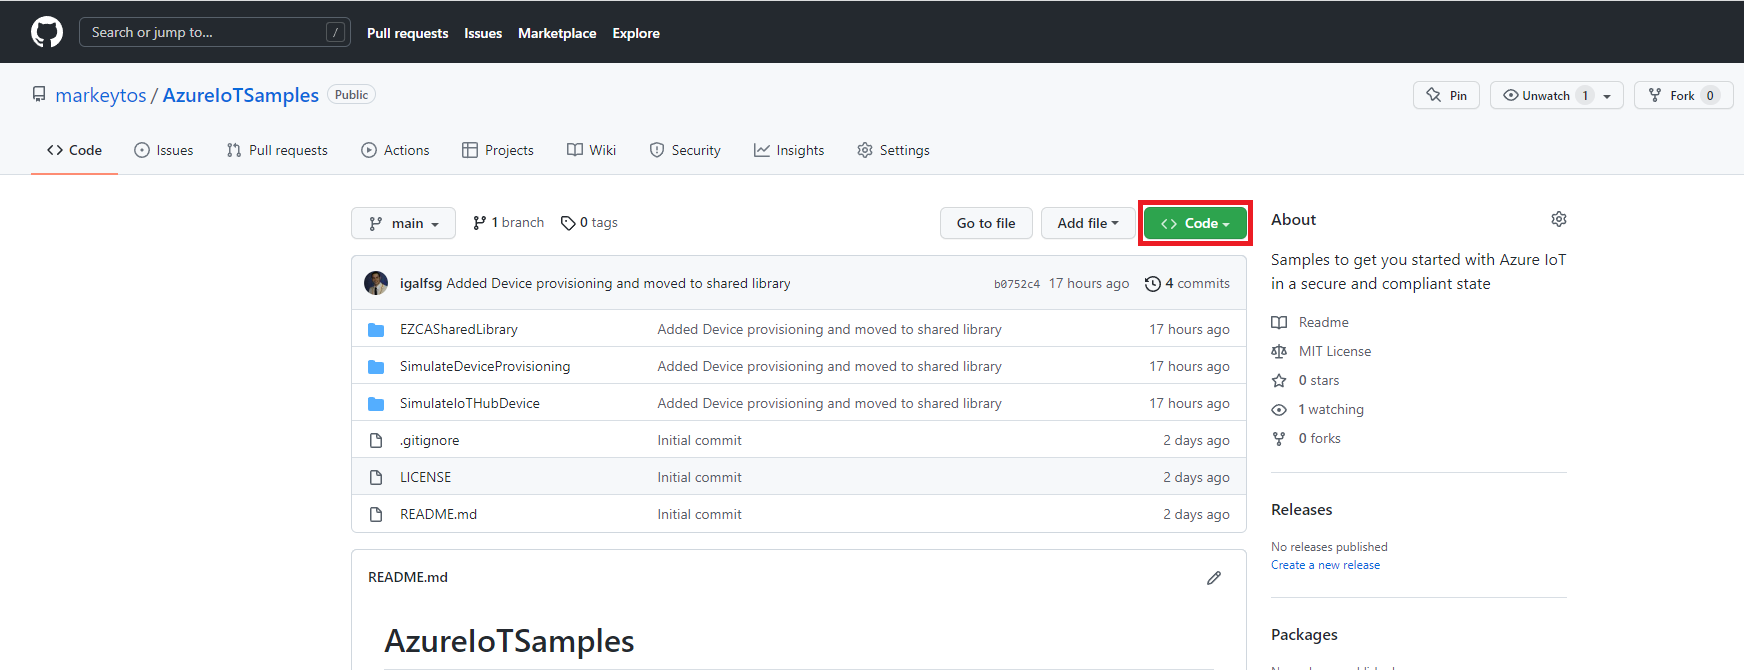
- In a new tab, go to our GitHub Azure IoT Samples Repository
- Clone or download the repository.
- Open the
SimulateIoTHubDevice.csprojproject located in AzureIoTSamples -> SimulateIoTHubDevice.This project has to be run on Linux or Mac due to a limitation that .NET in Windows requires you to use the windows cert store to use X509 Certificates. If you are in a Windows workstation, we recommend running this in VS Code WSL. Alternatively, you can modify the sample with our Windows Cert Store Sample to use the Windows store to create the certificates (not recommended since your IoT devices will not have a Windows store and you will have to rewrite the code again).
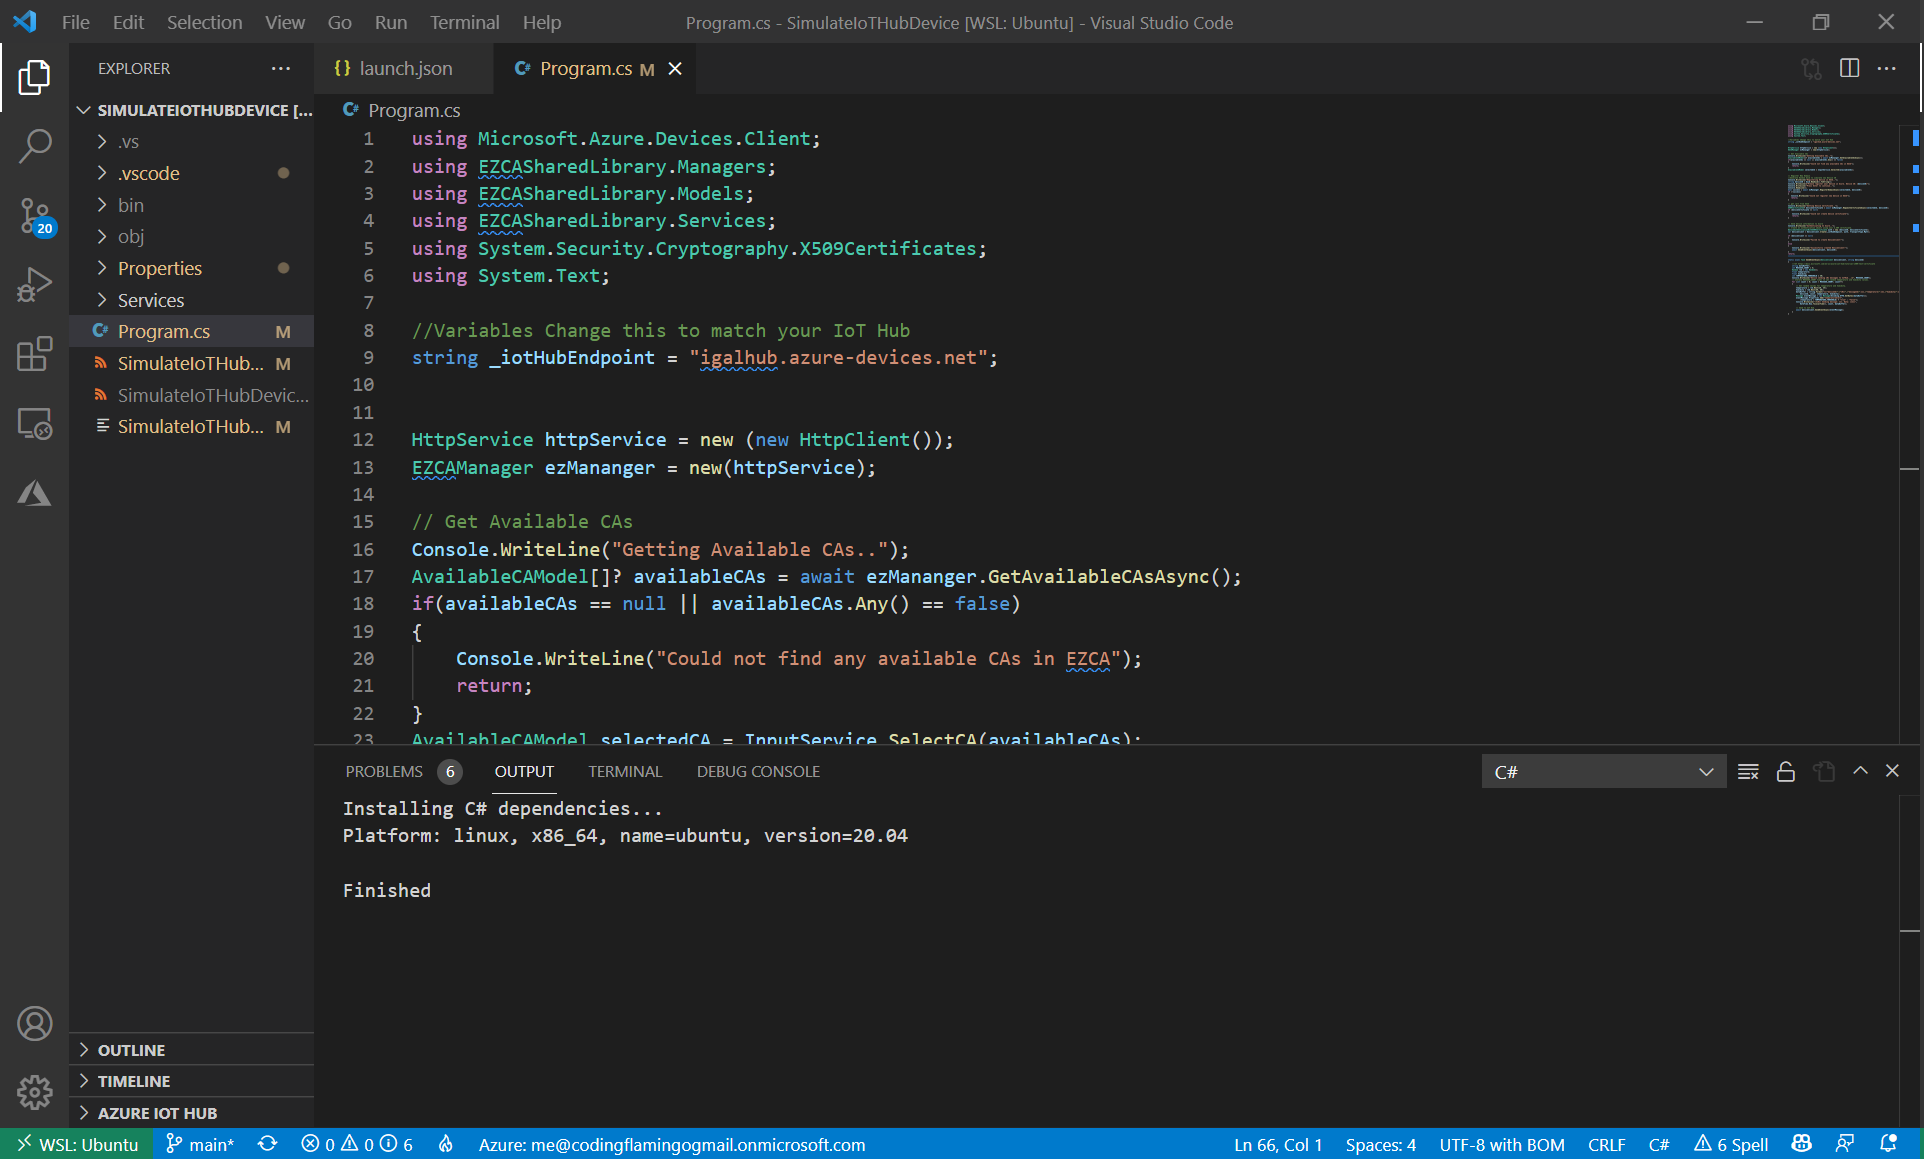
- For this sample to work, all you have to do is change the variable _iotHubEndpoint to match the IoT Hub endpoint of the resource you created at the beginning of this guide.
string _iotHubEndpoint = "YOURENDPOINT.azure-devices.net";
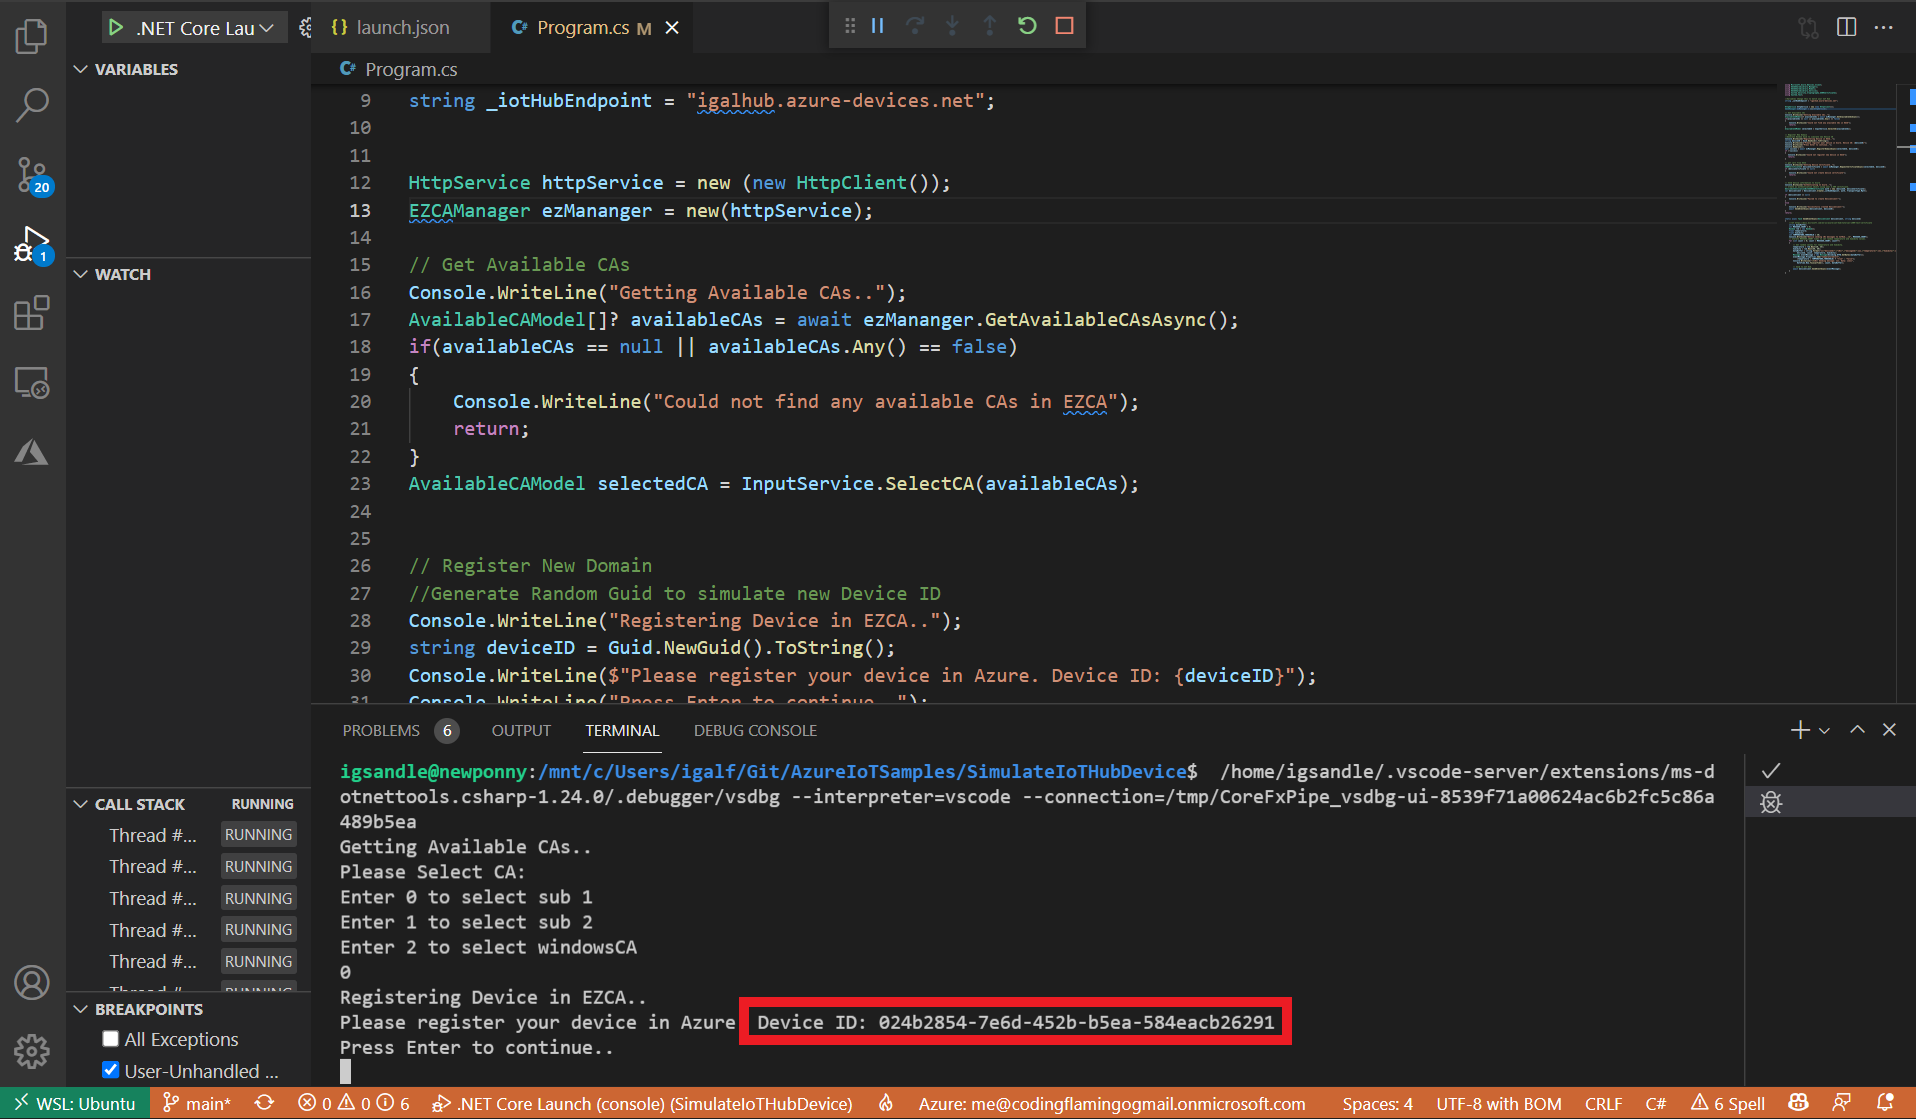
Adding Your First Simulated Device
- Once you change the endpoint run the project.
- Press the “Terminal” Tab in VSCode.
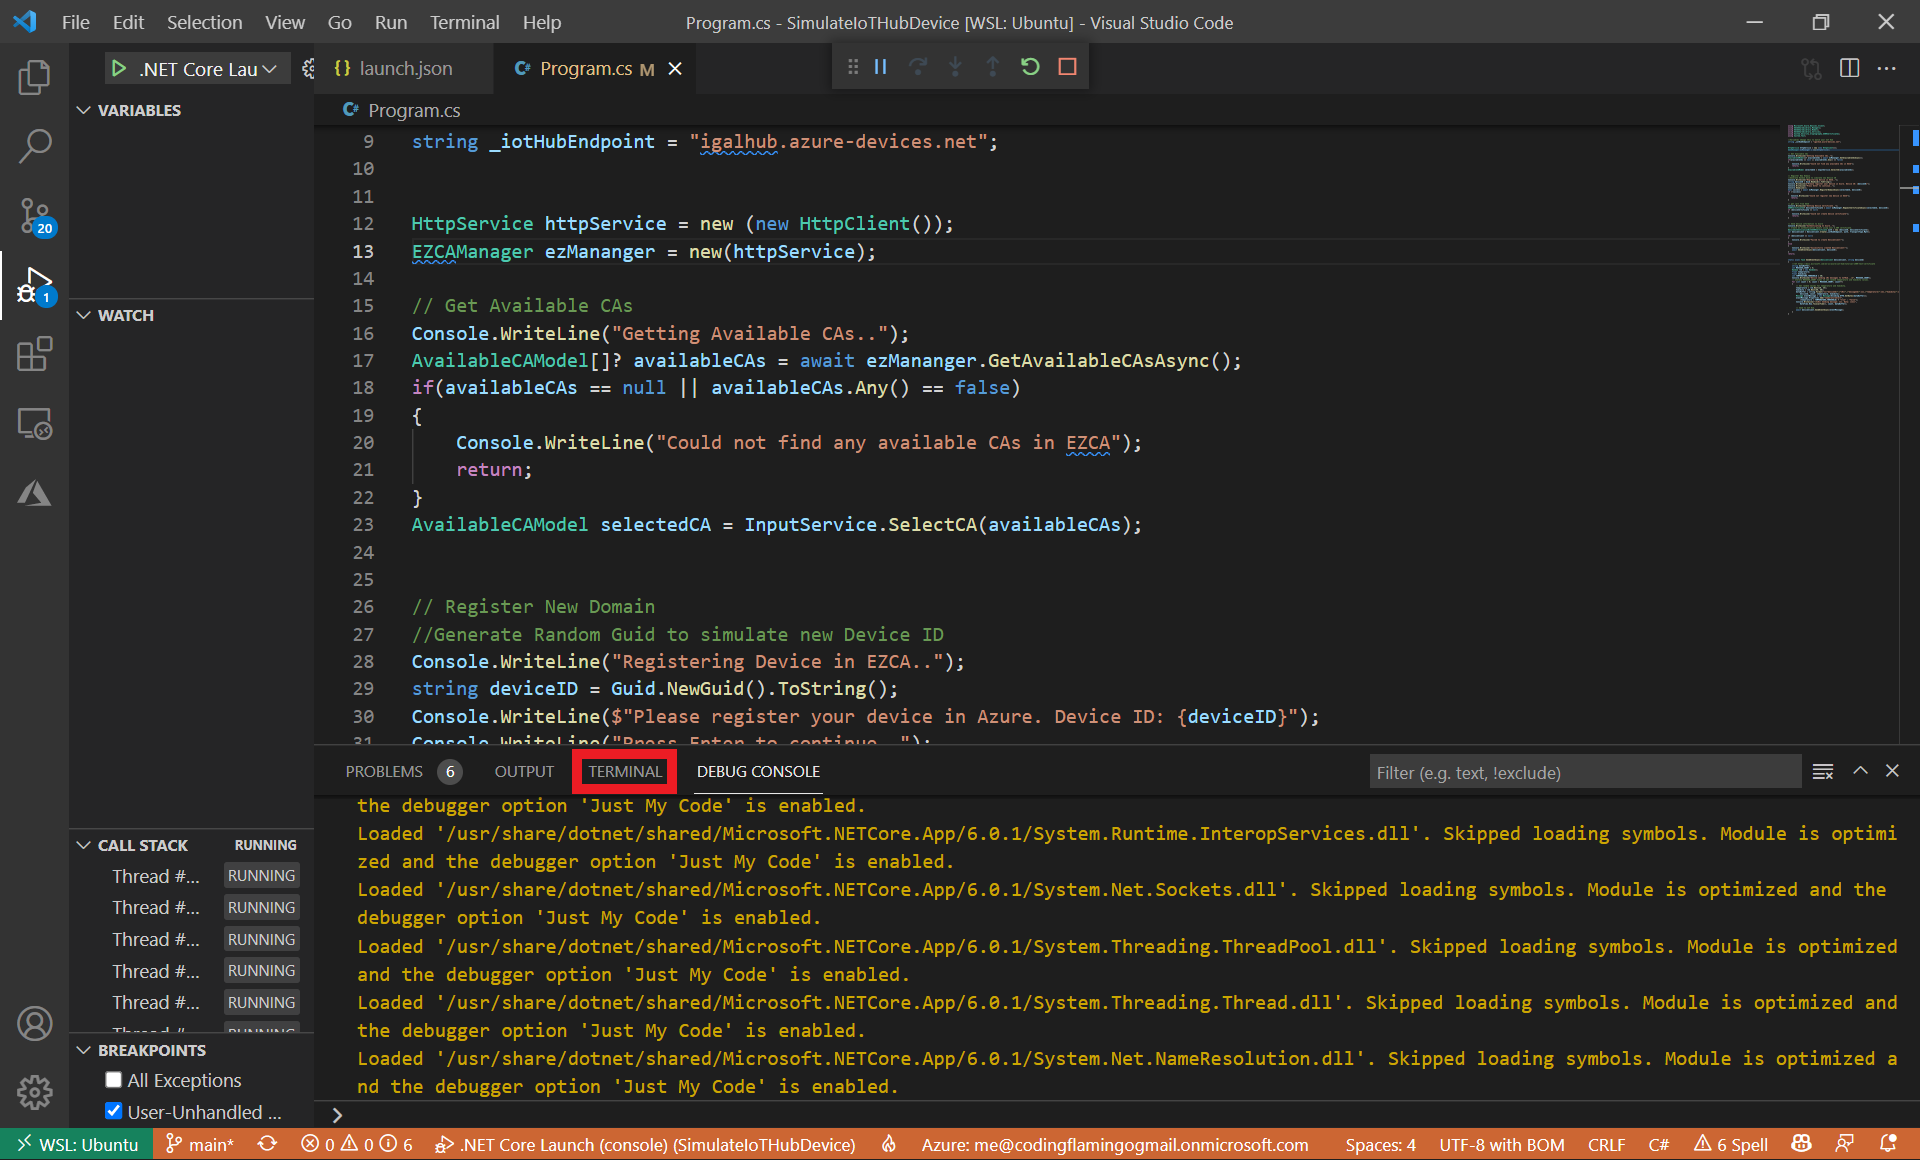
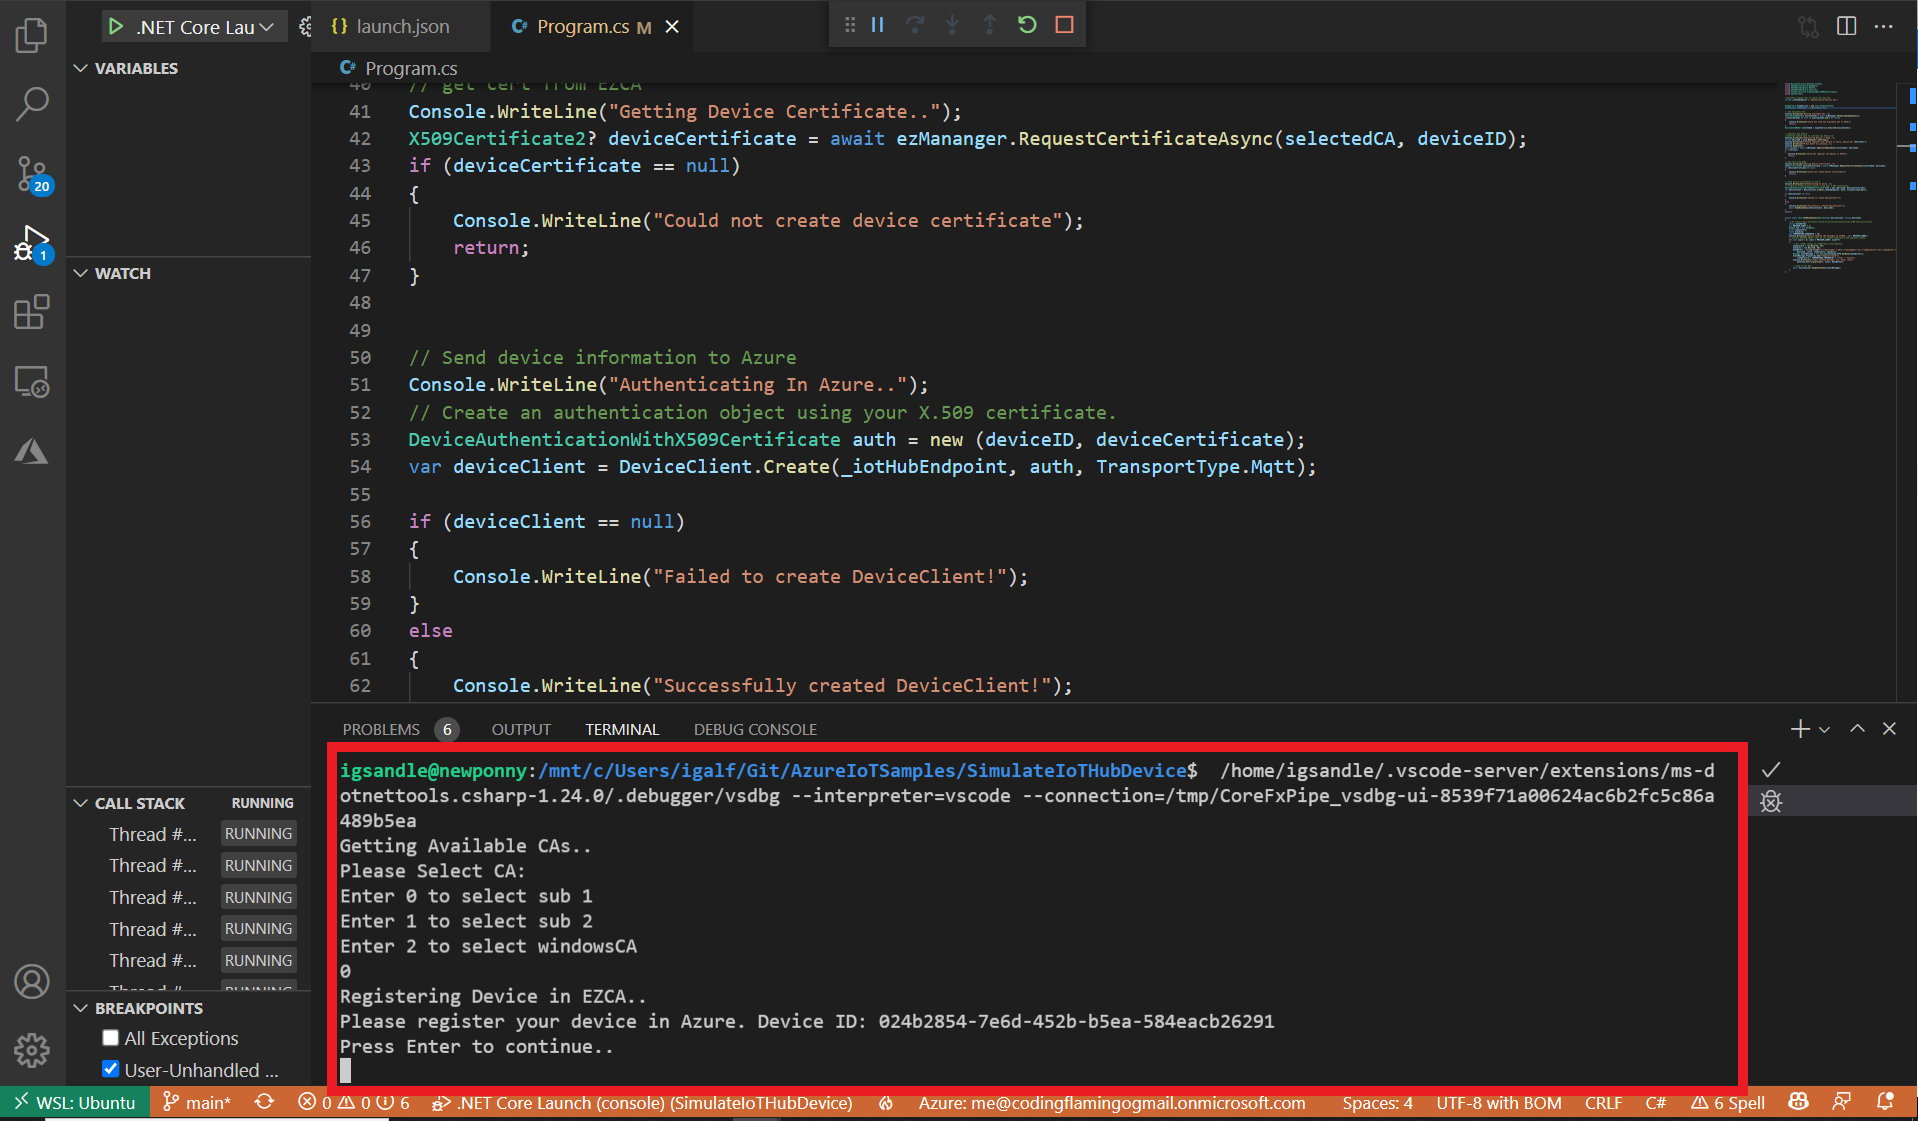
- If you have more than one available CA in EZCA, it will ask you to select the one you want to issue the certificate from.
This CA has to be one of the CAs you added to IoT Hub in the “Establish Trust Between IoT Hub and Your EZCA CA” step.
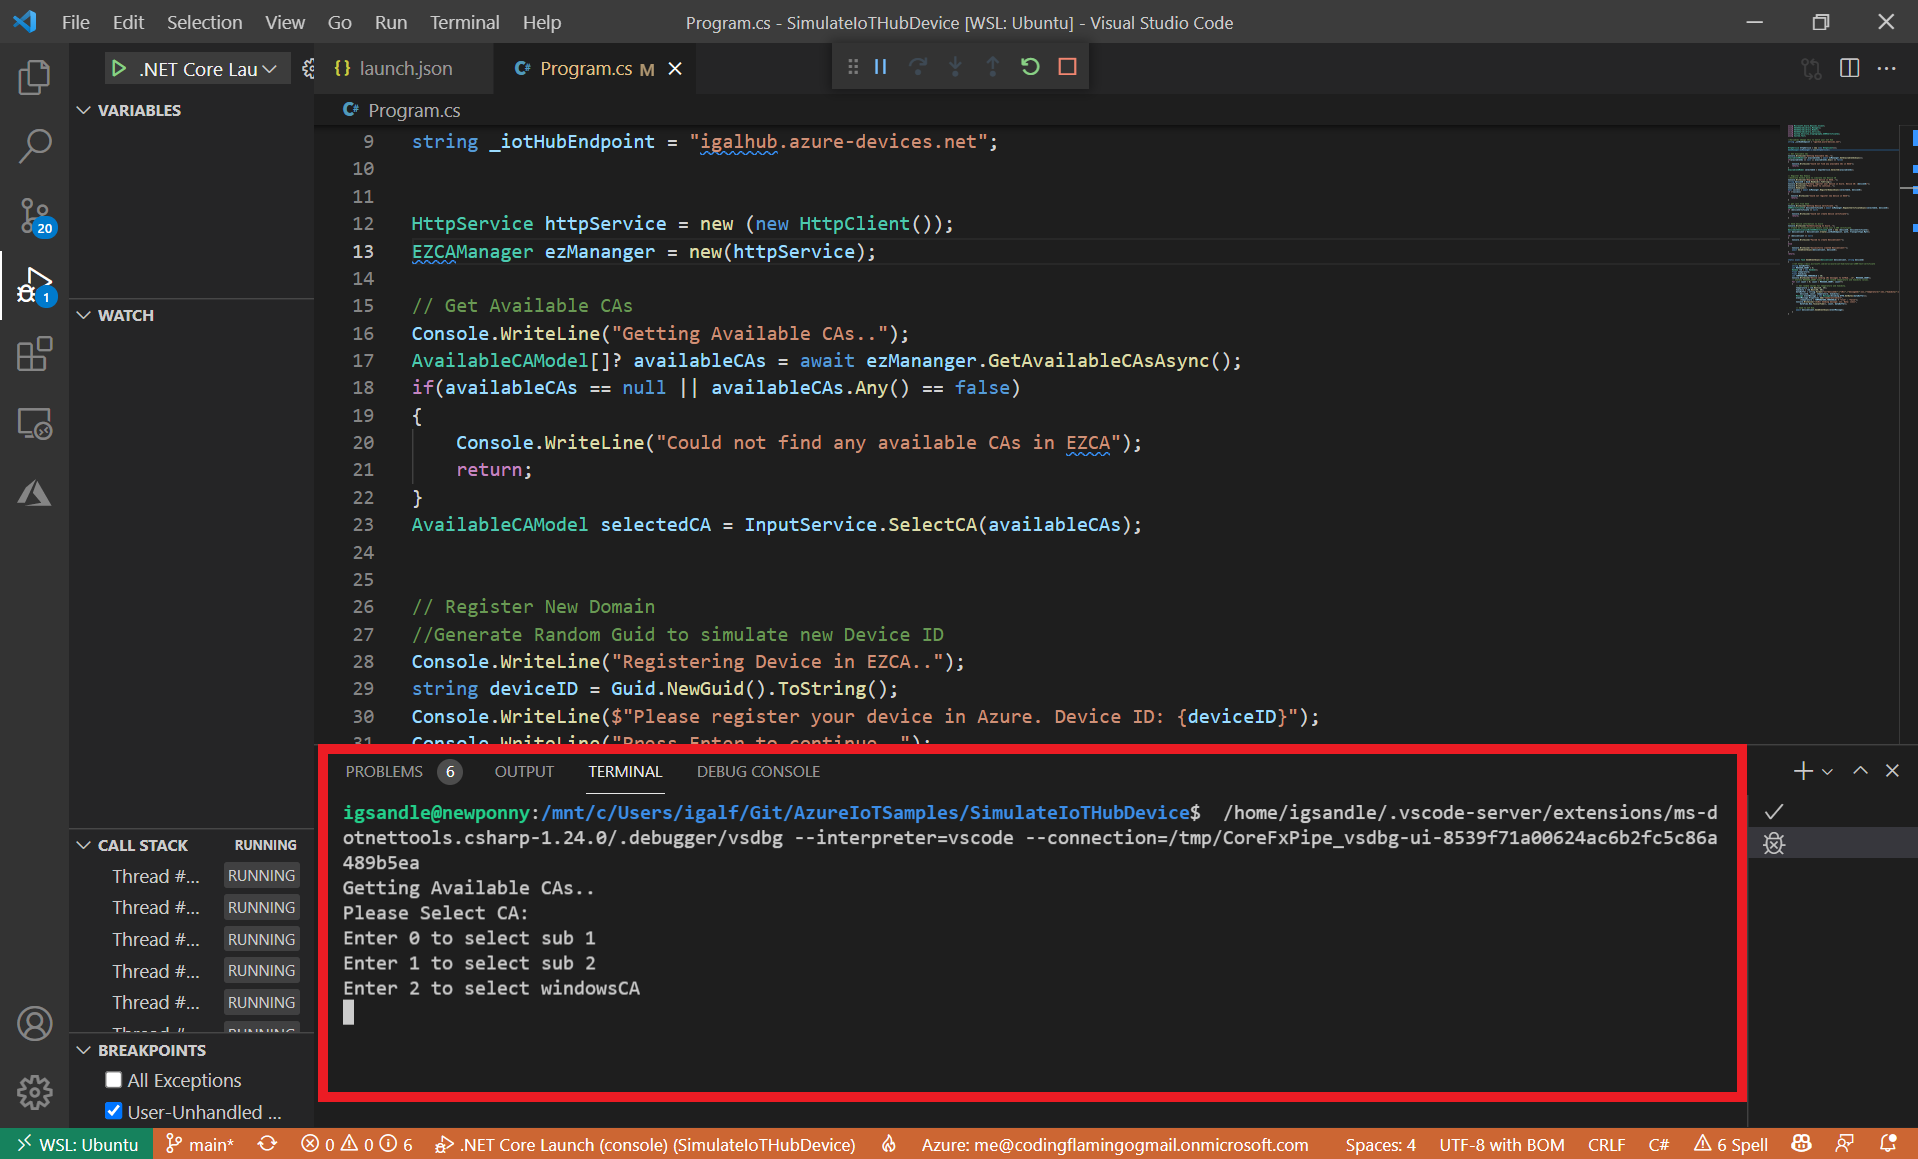
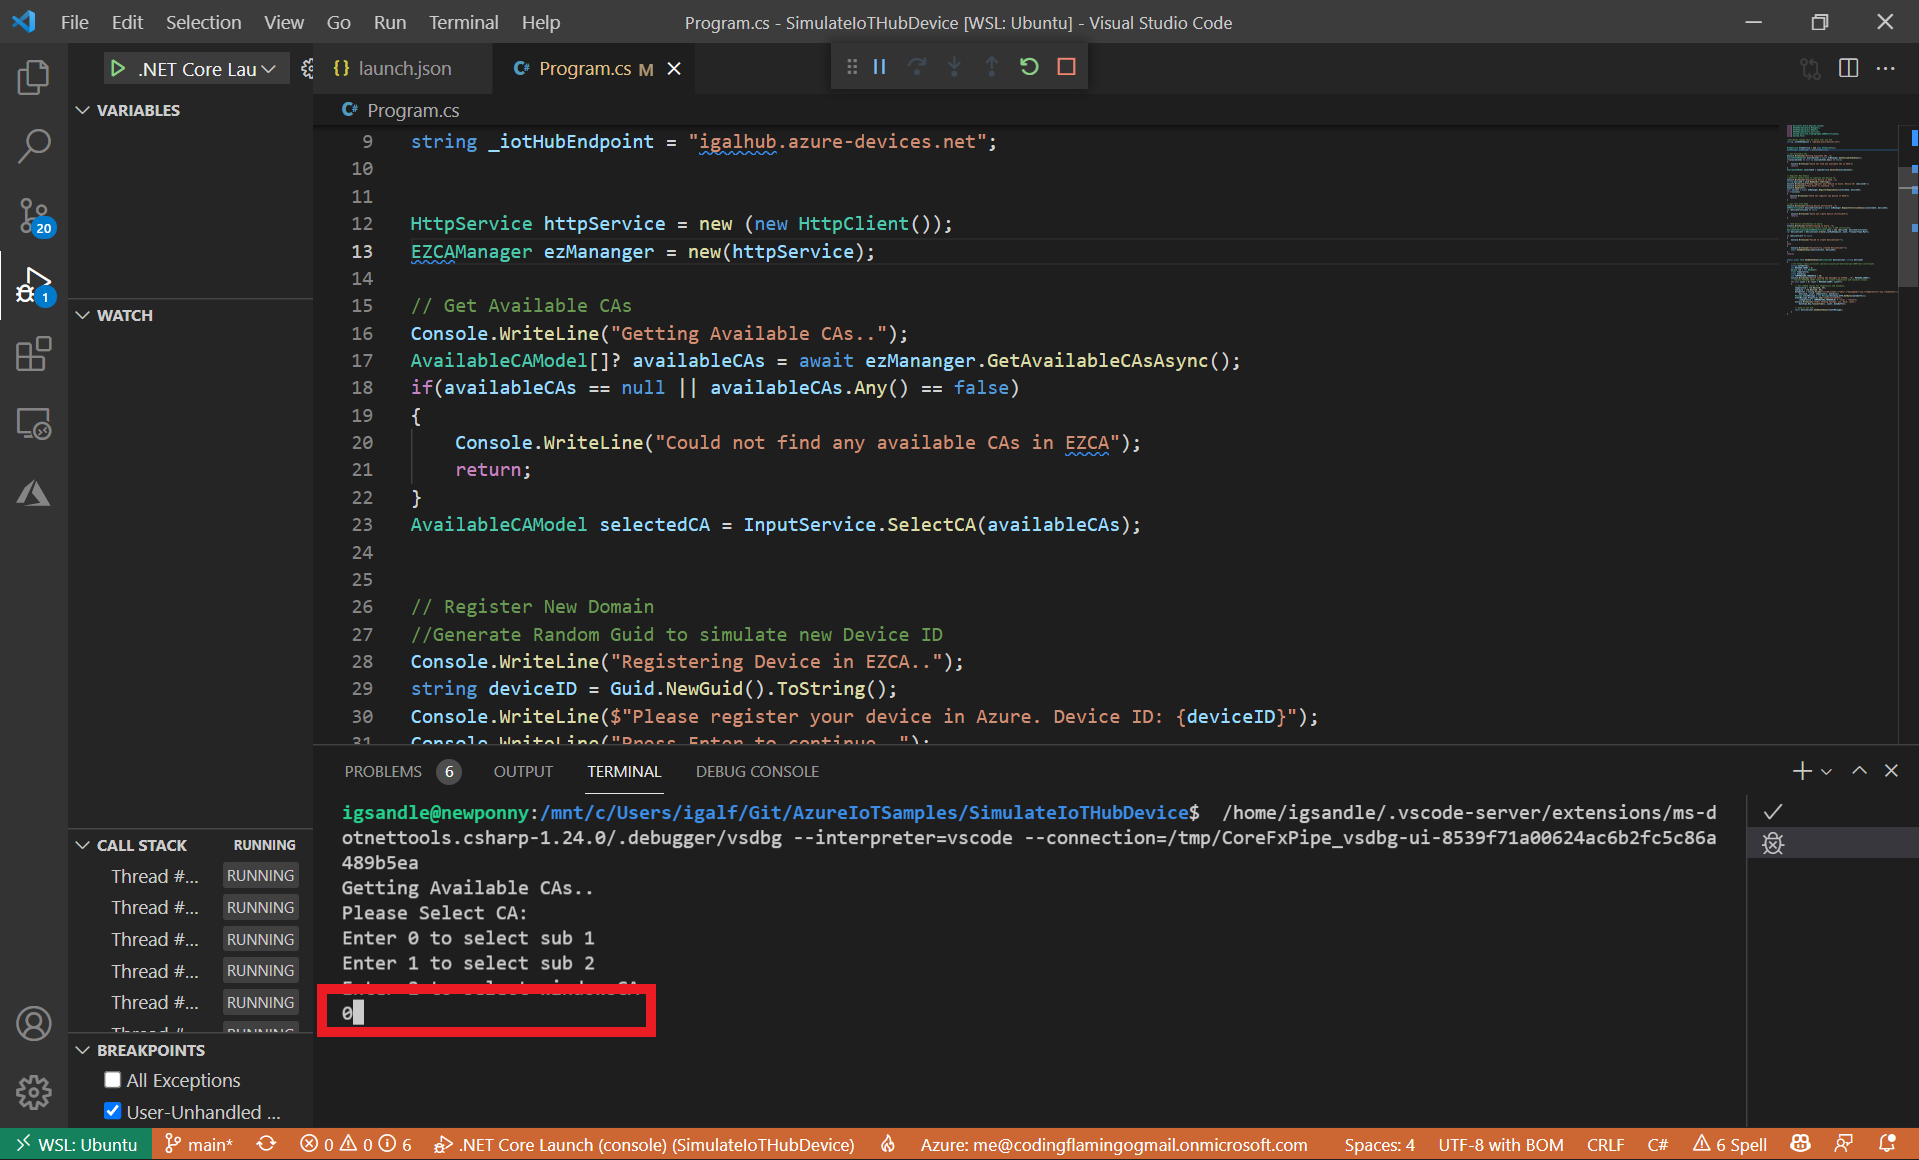
- Enter the desired number and press enter.
- The simulation program will then create a fake device ID to simulate a new device and ask you to register it in Azure.
Adding The Simulated Device To Azure
This step can be automated with Azure Device Provisioning Service, check out our guide on how to get started with automatic provisioning with Azure DPS.
- Copy the Device ID from the terminal.
- Go back to the Azure IoT Hub tab.
- Navigate to the Devices page, under the Device Management Menu.
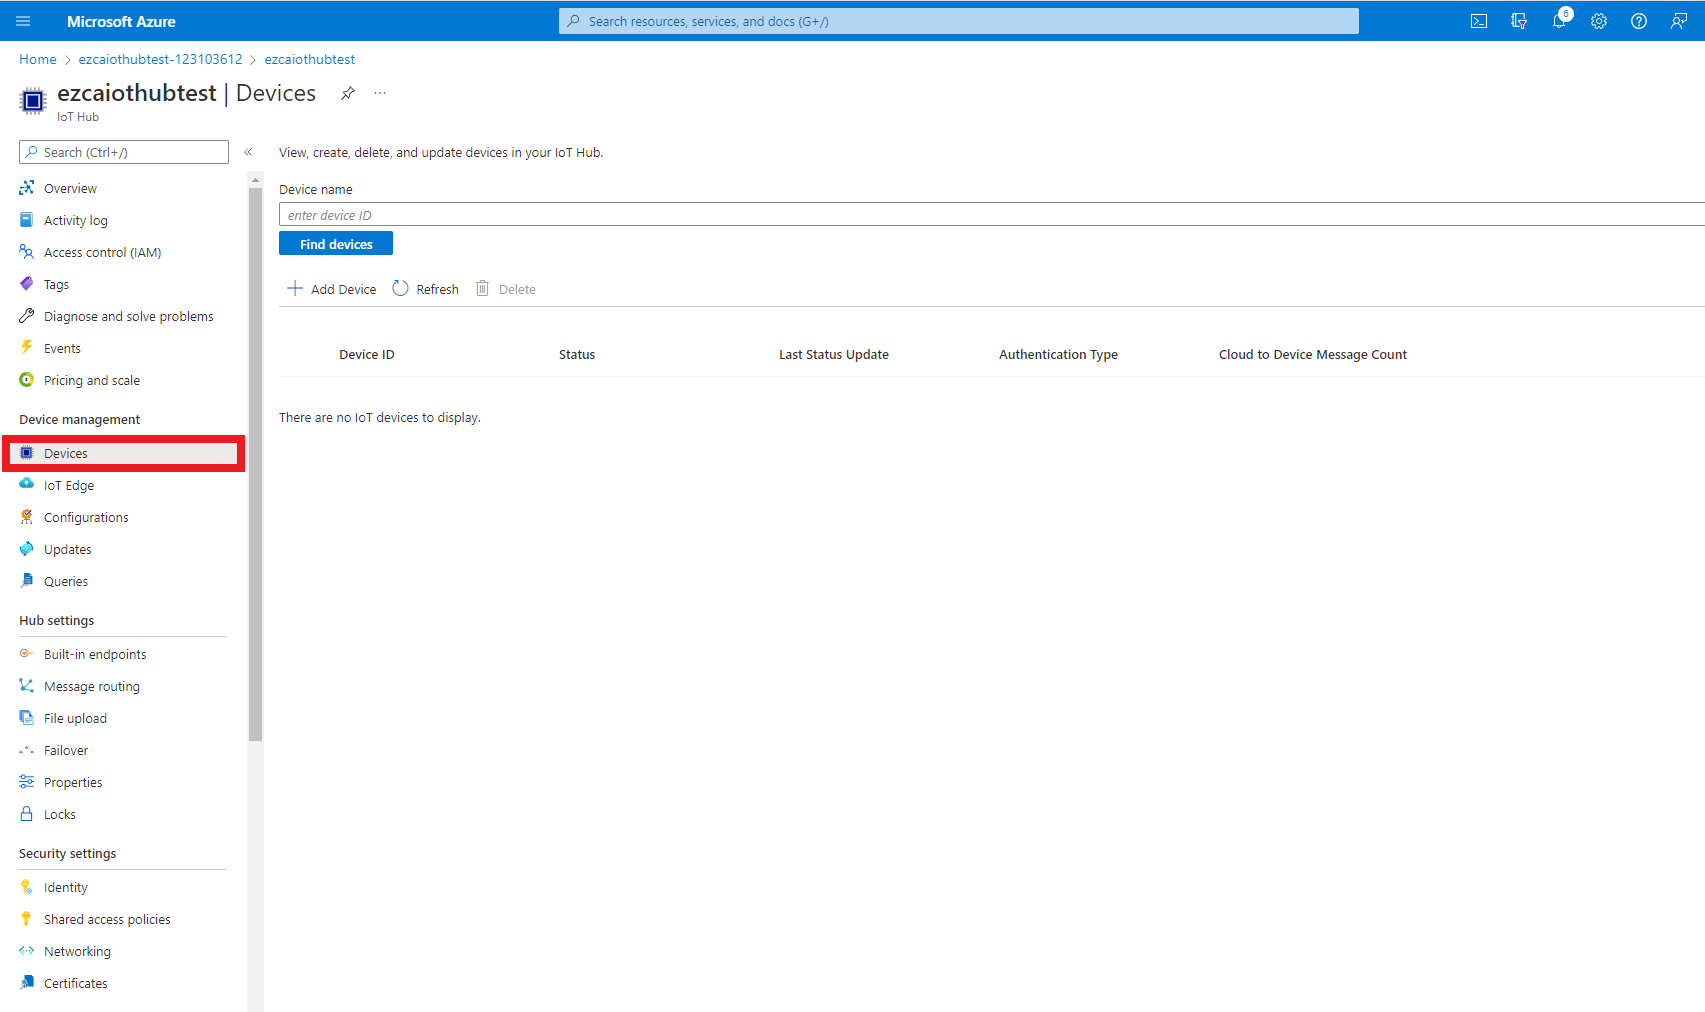
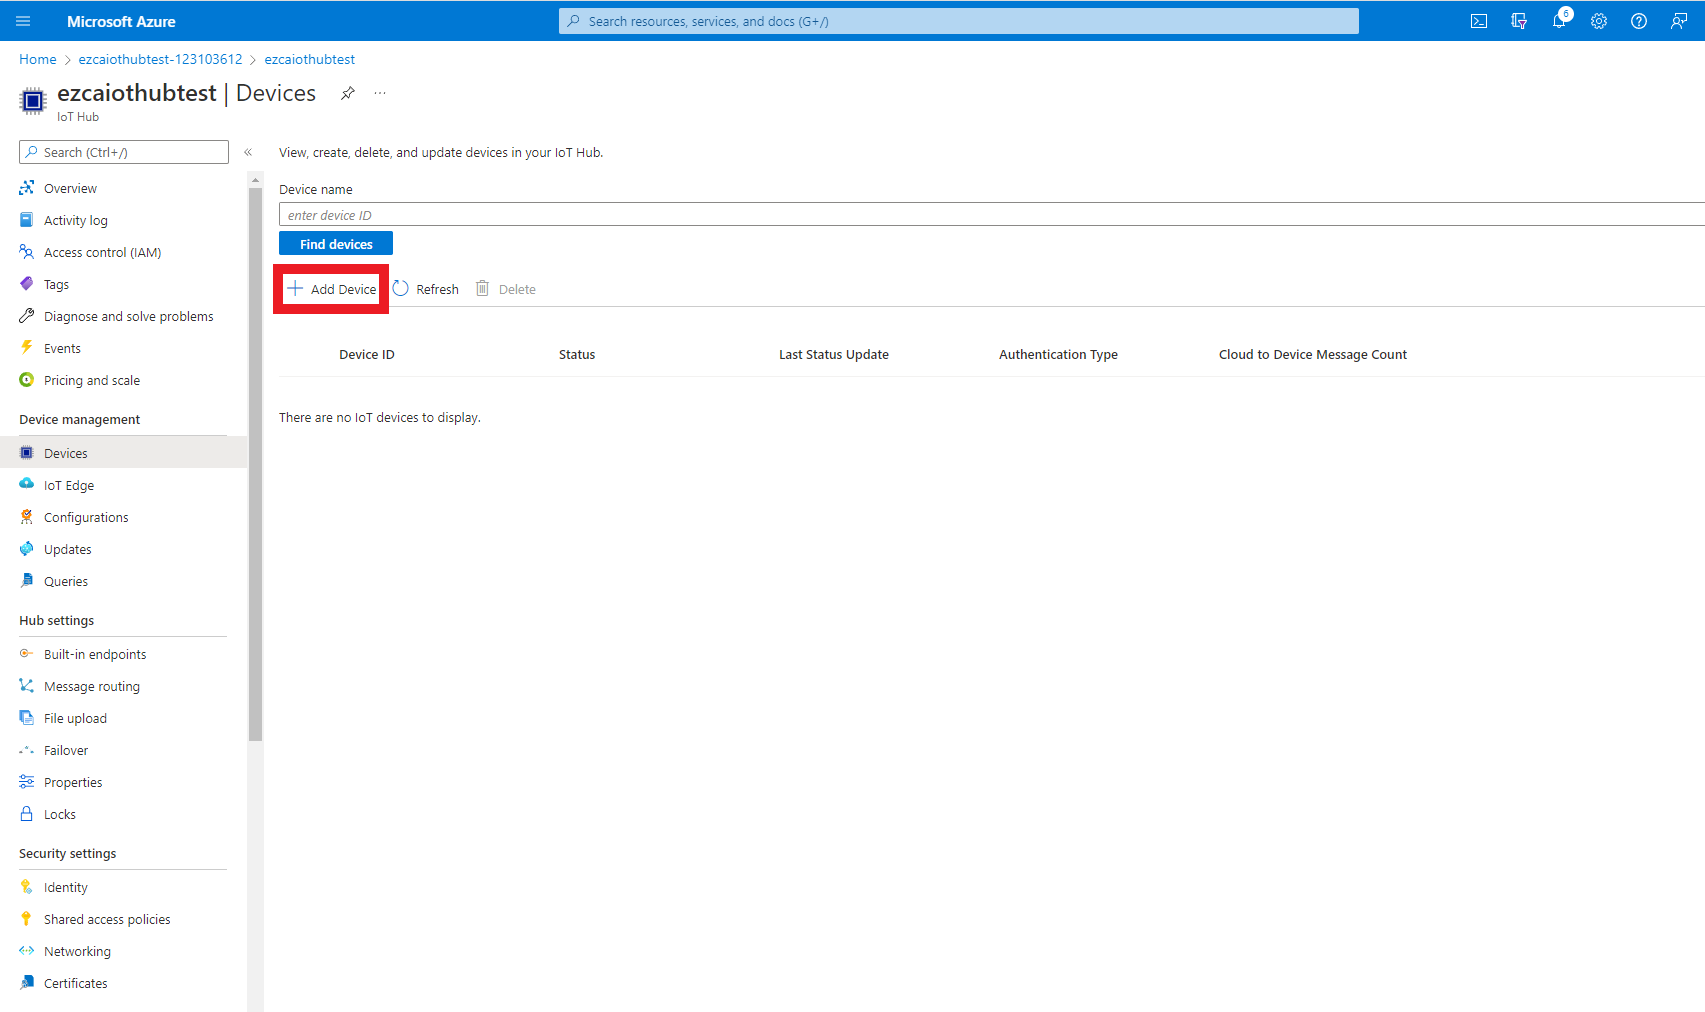
- Click on the “Add Device” button.
- Enter the device ID you previously copied from the sample program.
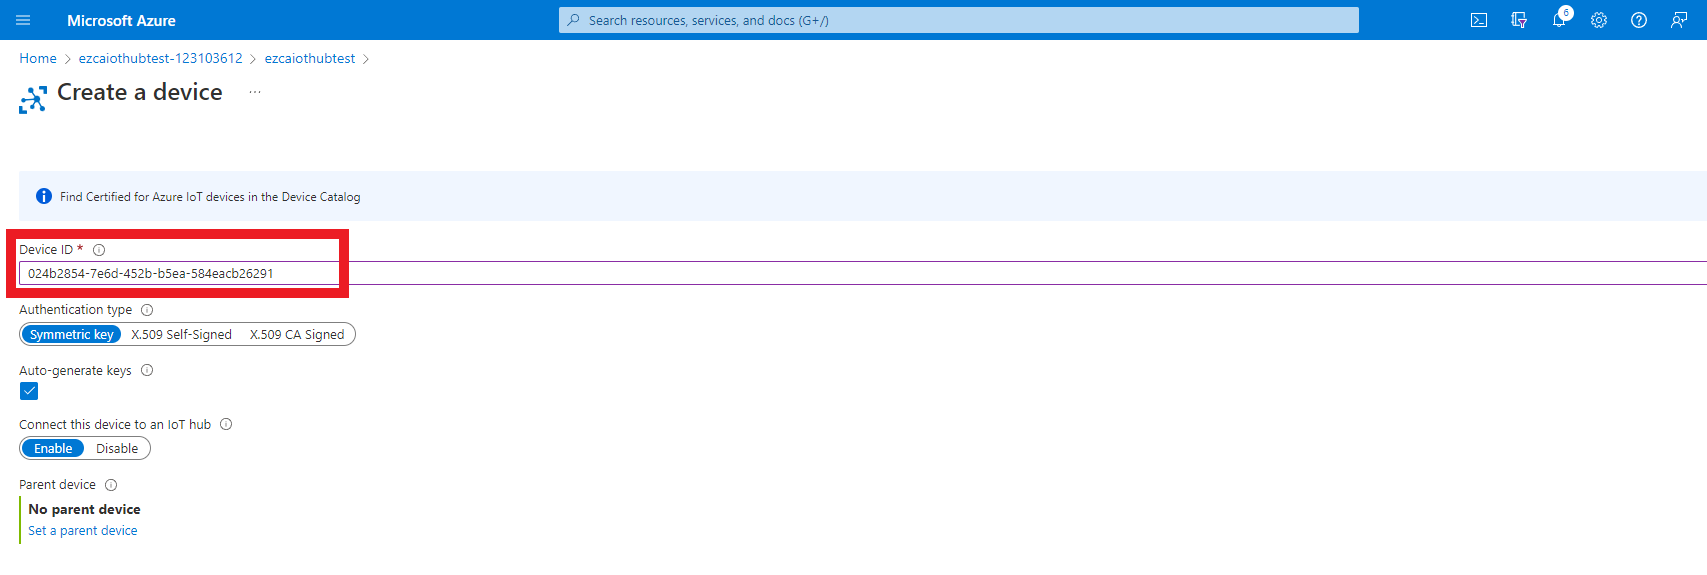
- Select “X.509 CA Signed” as the authentication type.
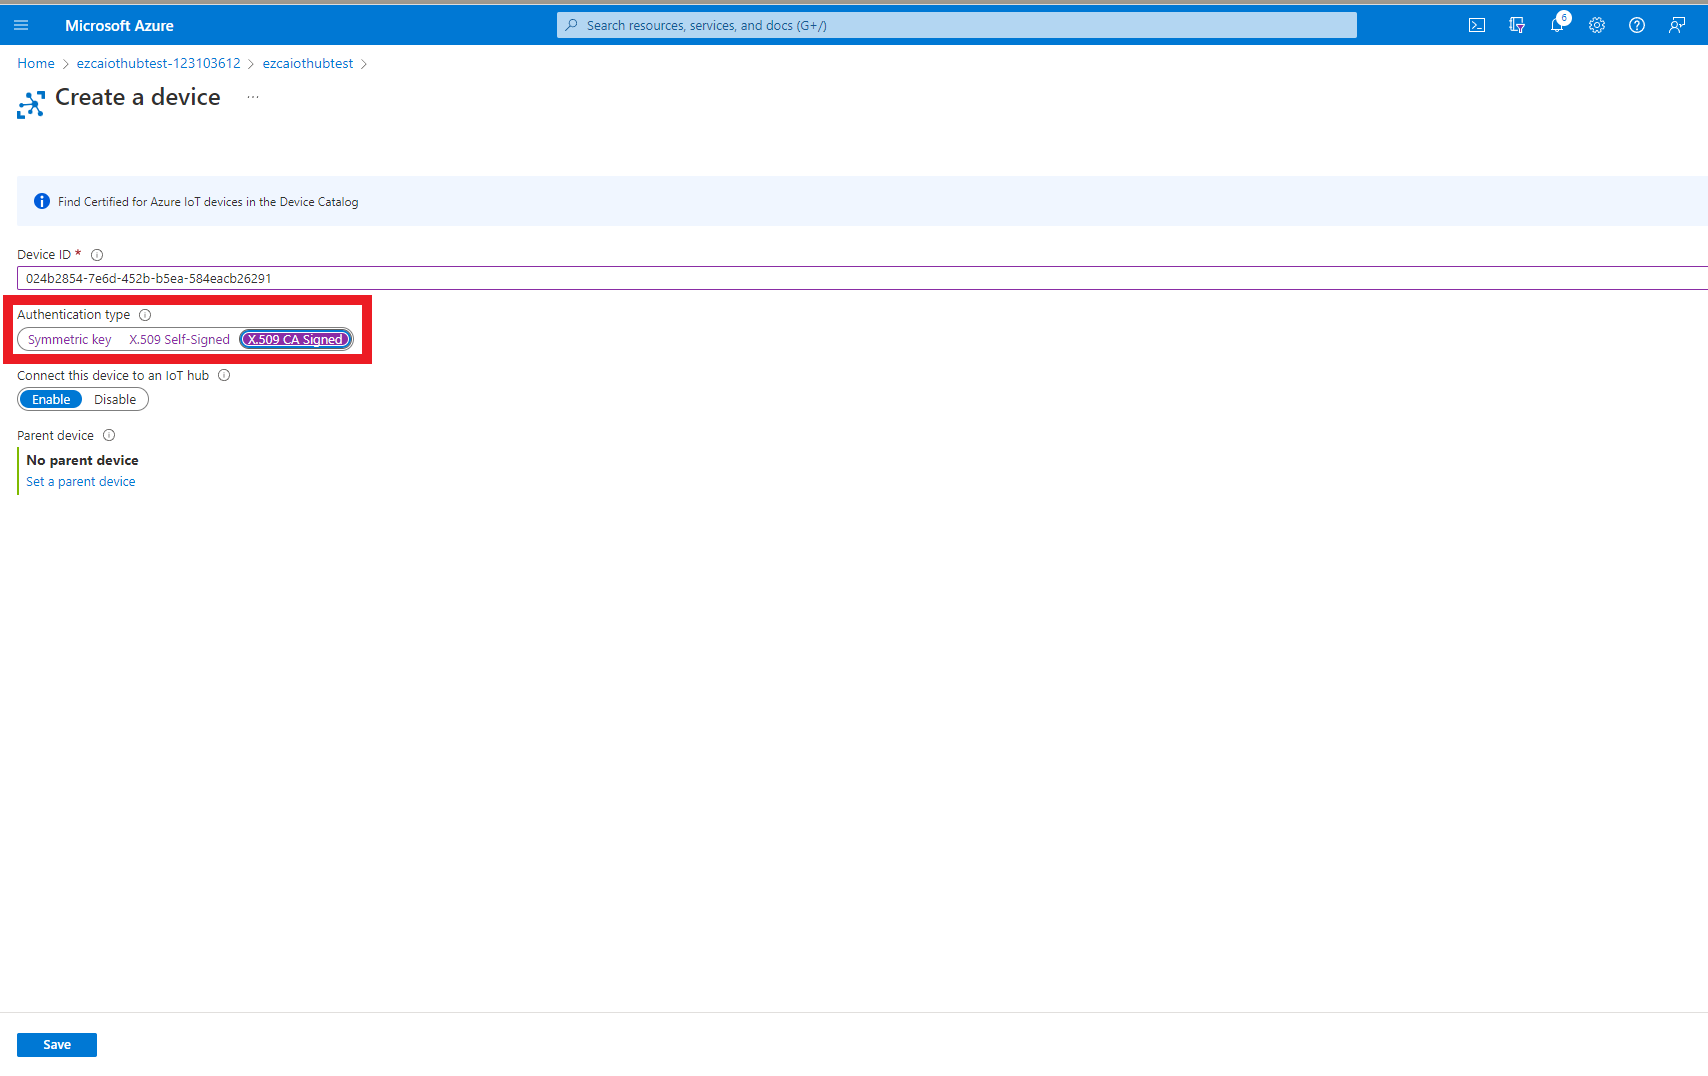
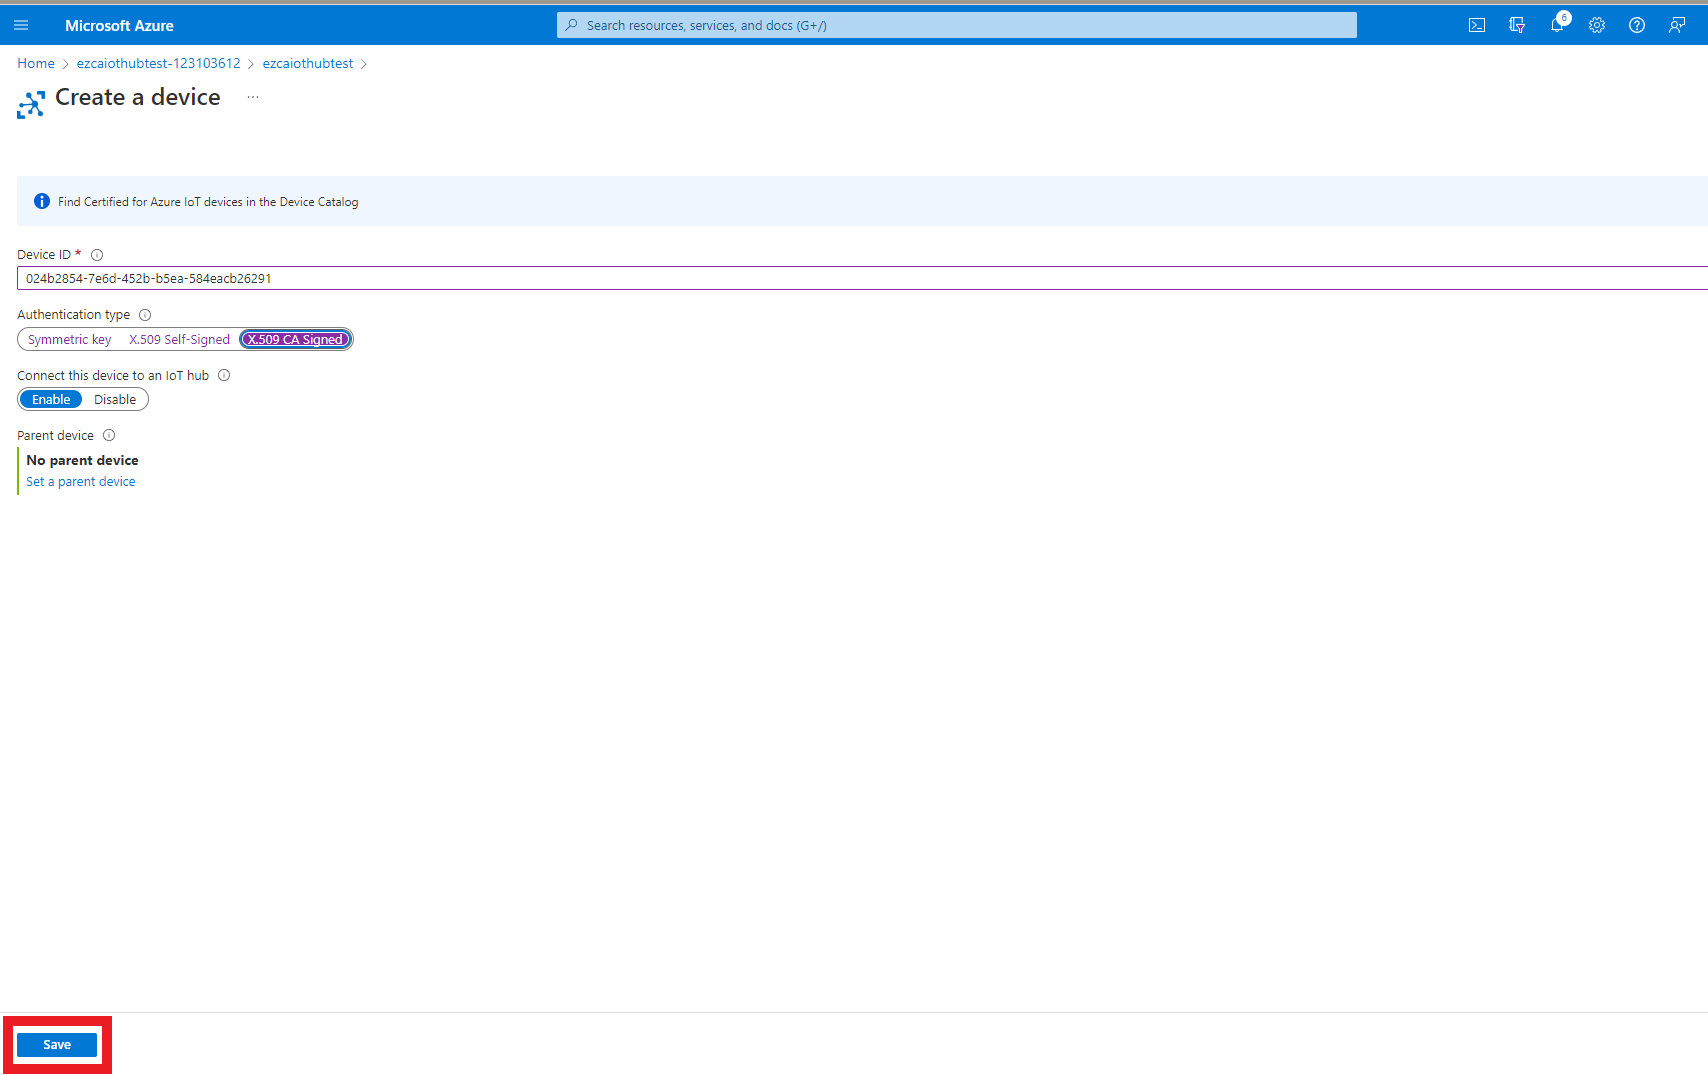
- Click the Save button.
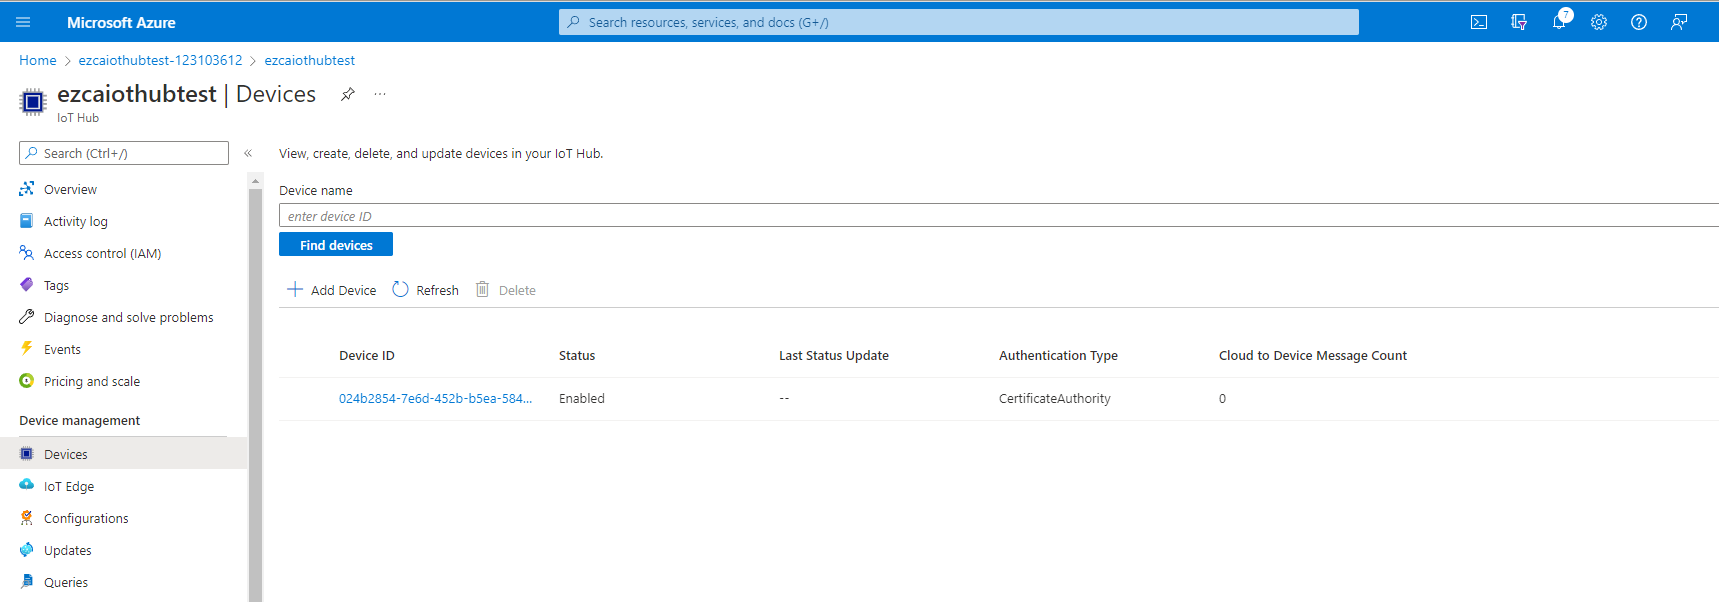
- This will create the device in Azure. Allowing Azure to send and receive messages from this device.
Getting the certificate
- Once the device is registered in Azure, we are ready to continue with the program.
- Go Back to VS Code, put your curser on the terminal end press enter.
- The simulator will then reach out to EZCA, create a new certificate.
- Then it will send 5 randomly generated temperature readings to Azure.
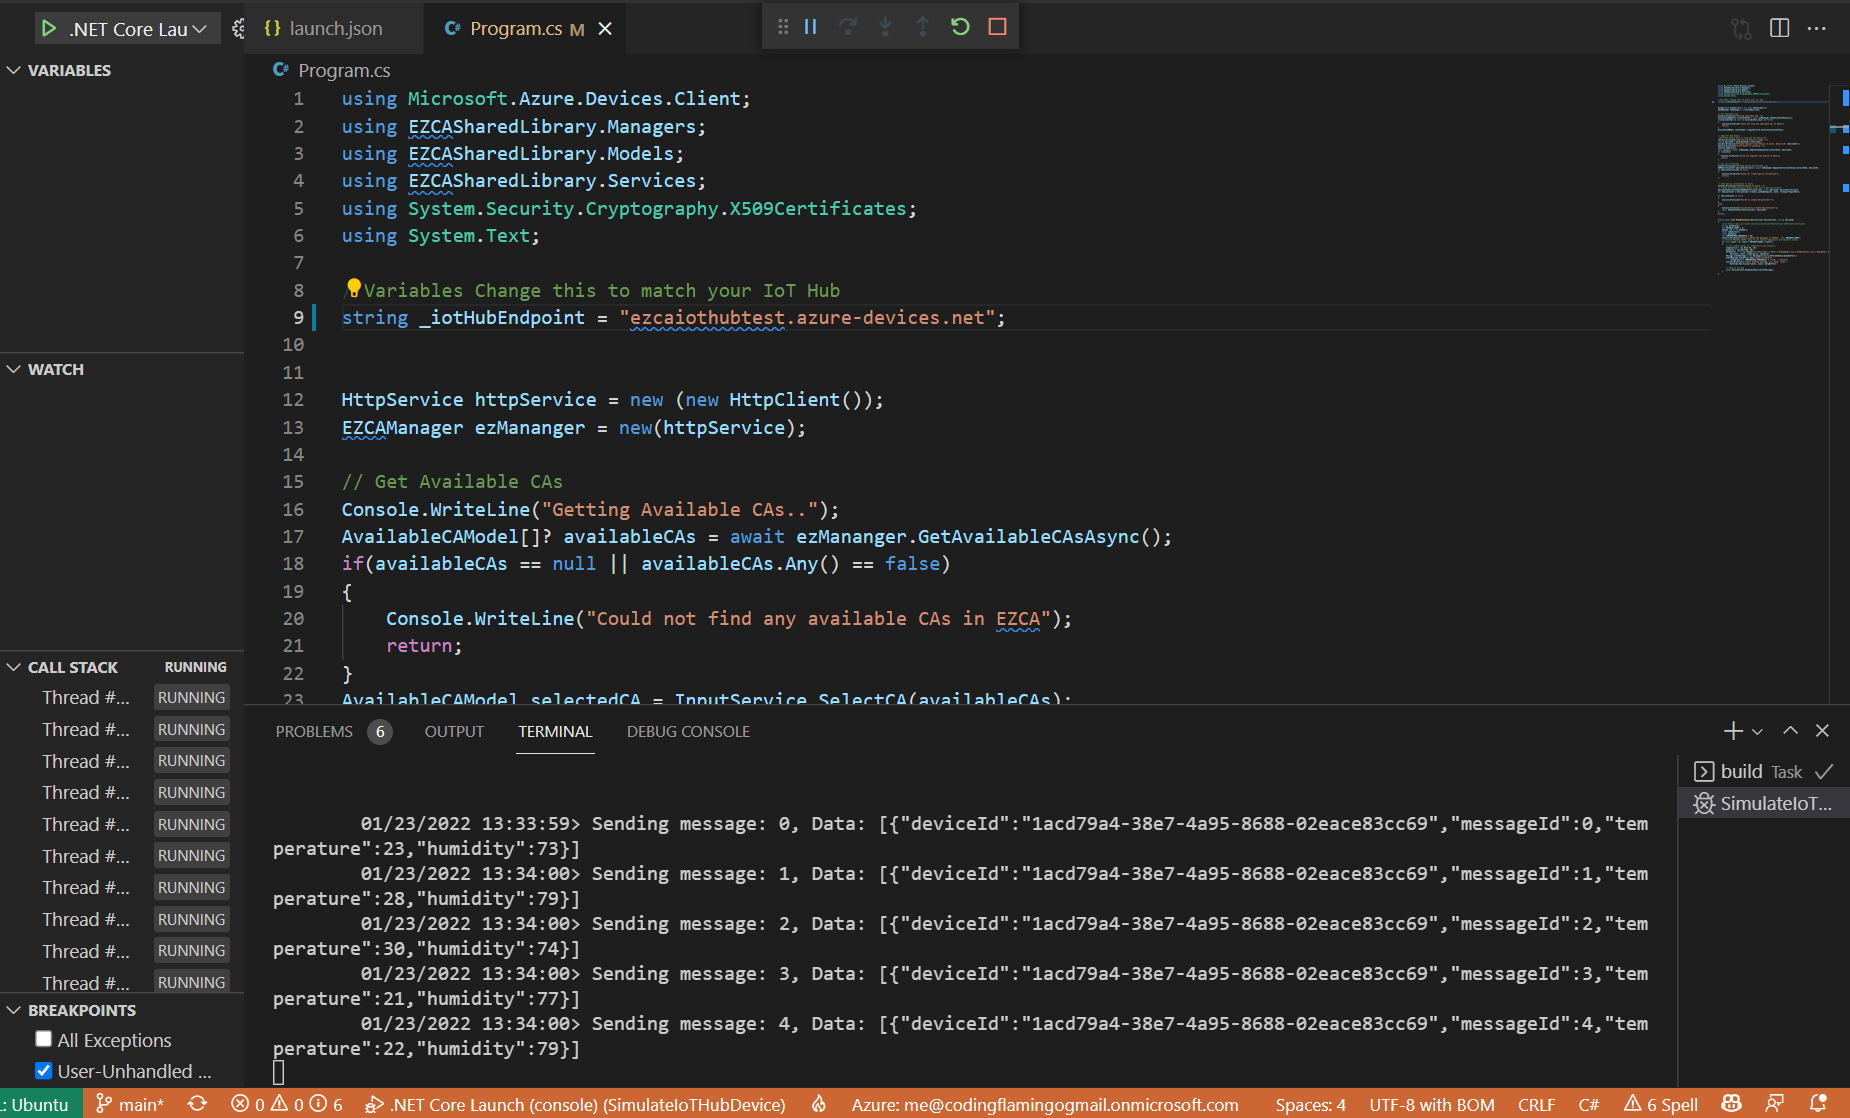
- You can now stop the debugger.
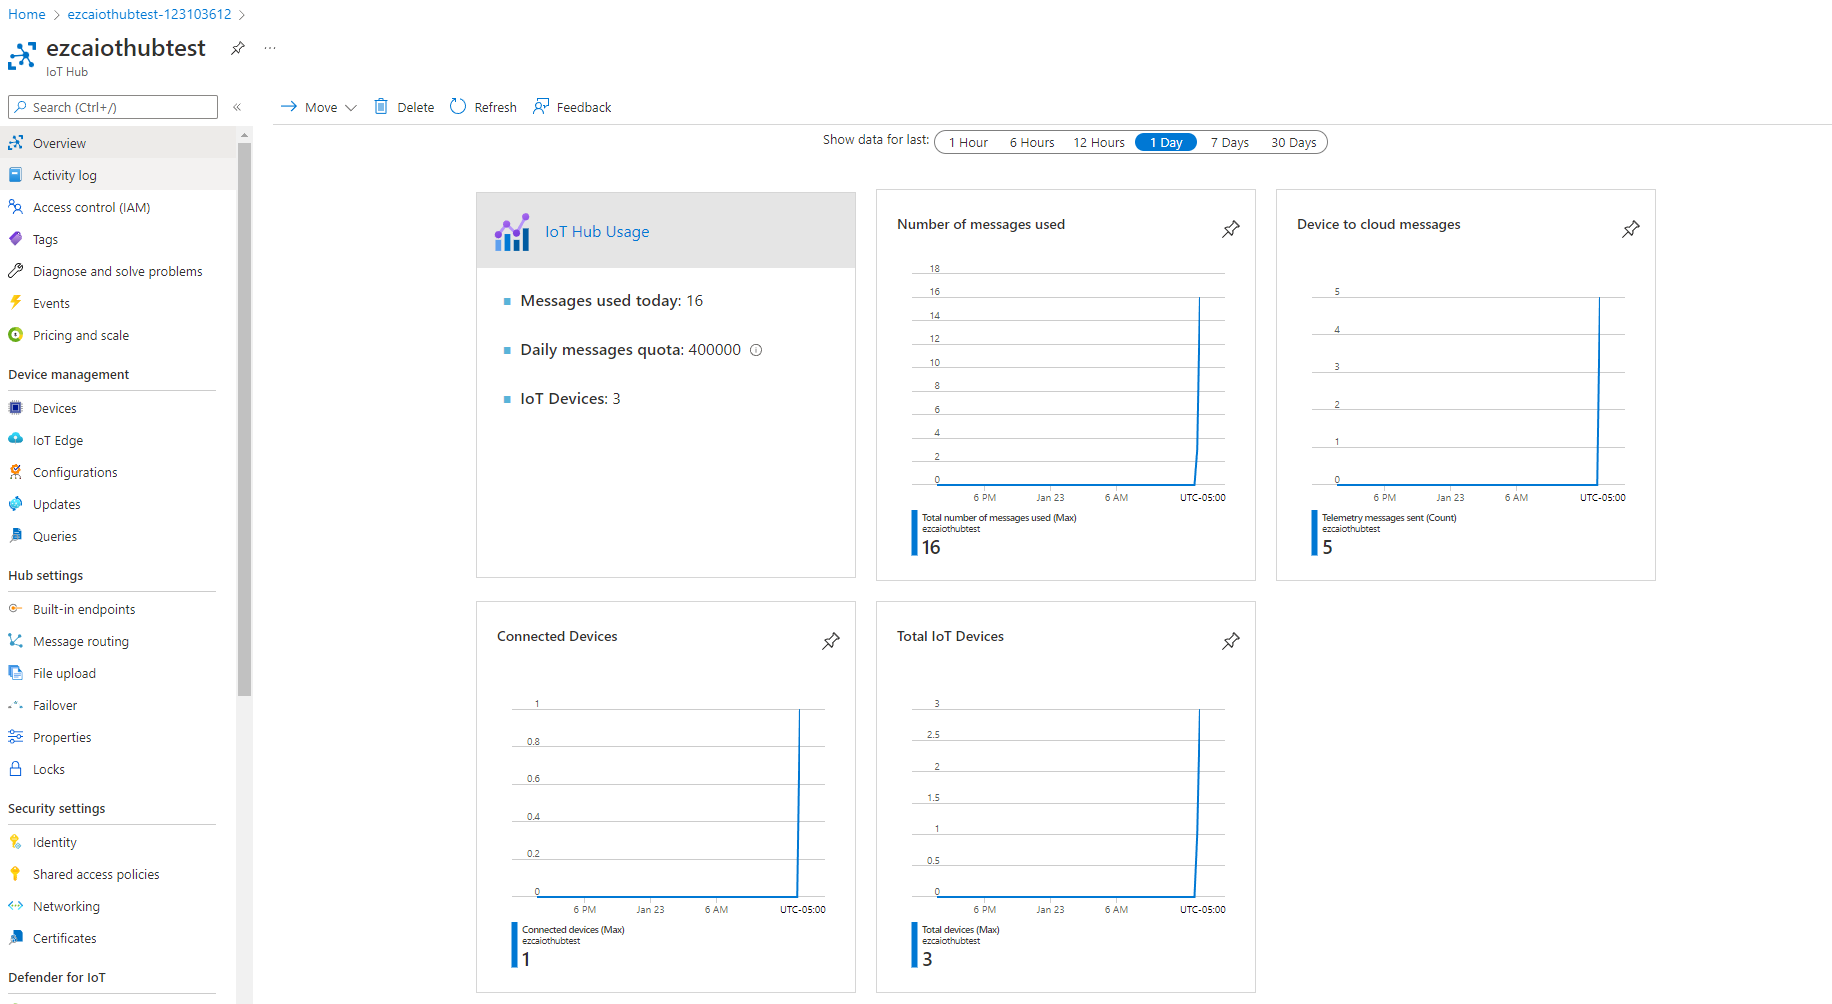
- Going back to the Azure portal we can see the messages have been received by Azure
Understanding The Code Sample
While having a working code sample is great, we recommend going in and understanding the details of what the code is doing. For this I am going to open the solution in Visual Studio to also see the EZCASharedLibrary.csproj library that this project depends on to create the certificates.
- Open the
SimulateIoTHubDevice.slnsolution in Visual Studio or your preferred text editor. - This solution has 3 projects:
EZCASharedLibrary.csprojThis project is a library to call EZCA and manage all the cryptographic operationsSimulateIoTHubDevice.csprojThe project used for this tutorial (It depends on EZCASharedLibrary for cryptographic operations)SimulateDeviceProvisioning.csprojThis Project is covered in our guide for using Azure’s Device Provisioning Service. It is basically this project + the code to automatically provision devices.
- Open the program.cs located in the
SimulateIoTHubDevice.csprojproject.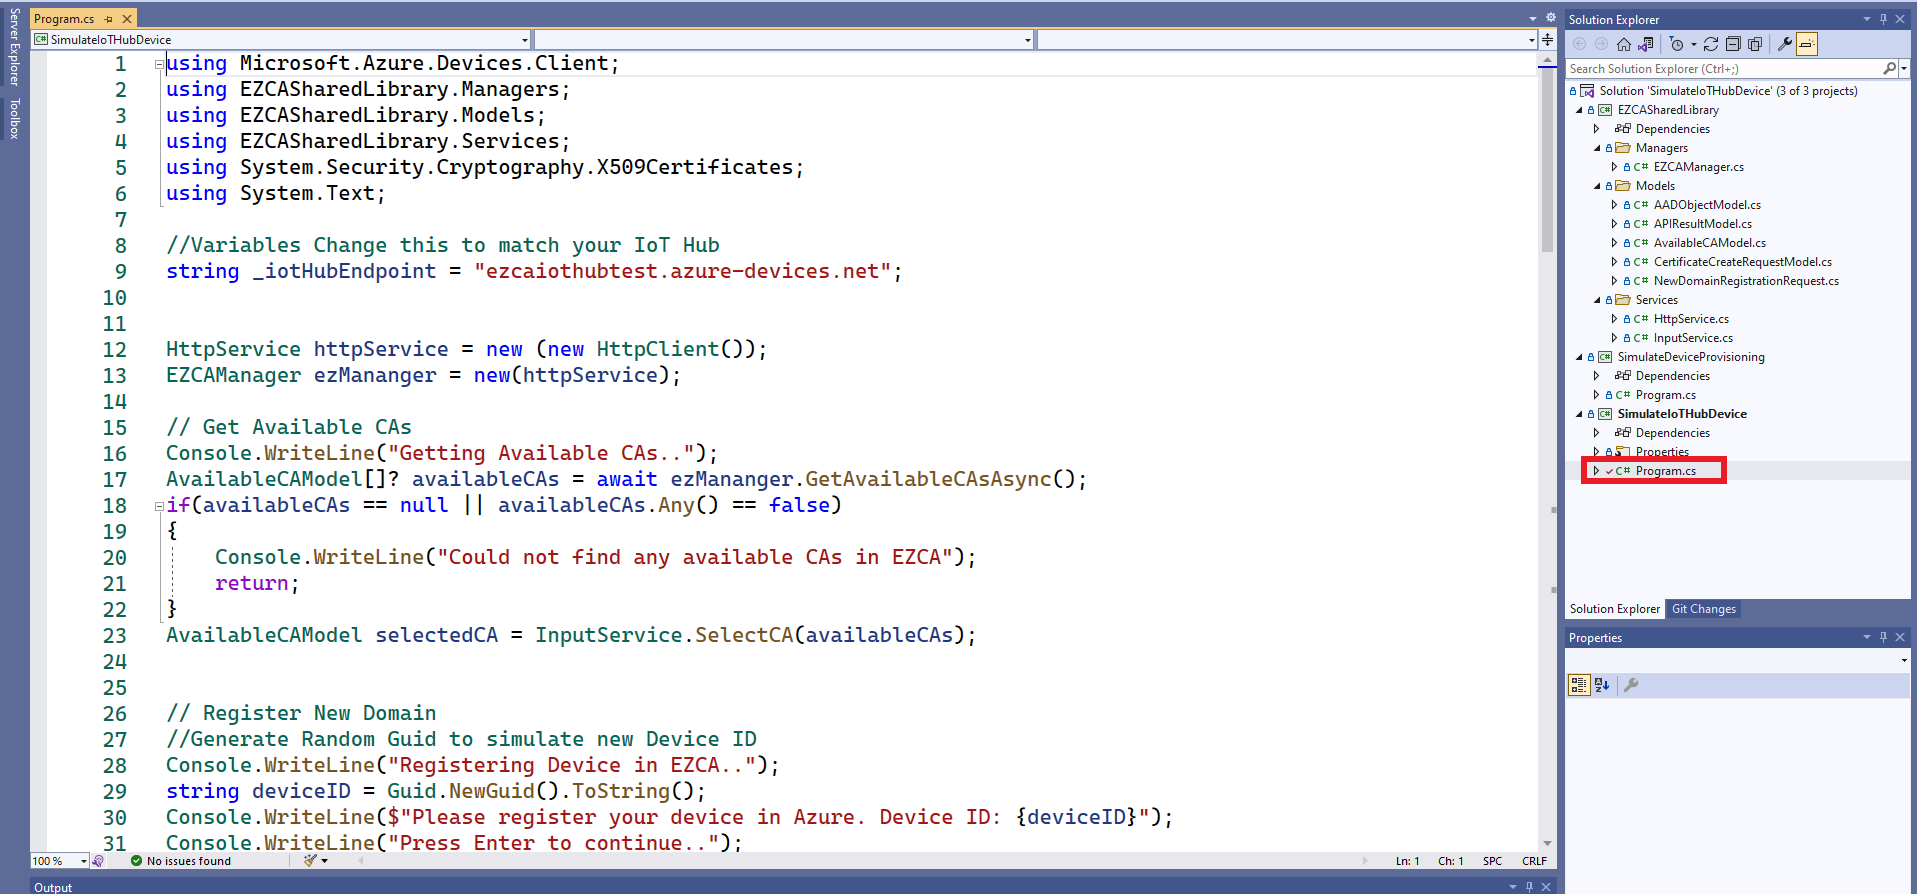
Selecting Issuing CA
This part of the code is for usability of the sample, in real production scenario, the CA would have been selected in advance and passed as a setting to the registration program.
Getting Available CAs
- First we call
ezManager.GetAvailableCAsAsync()if we deep dive into this function, we can see that it gets a token and then calls an API to get the available CAs. Let’s dive into the get token function.As we can see, this function uses Azure default credentials which will try to use an MSI and then your developer credentials. This is great for development since it allows you to use your person identity to authenticate as a machine. However, as we outline in our guide IoT Security Best Practices the IoT devices should be issued by a machine. If that machine is an Azure computer, no need to change this code. If the machine programming your IoT devices is not an Azure VM, You will have to change this authentication code to use an Client Certificate Credentialprivate async Task<string> GetTokenAsync() { if (_token == null || _token.Value.ExpiresOn < DateTime.UtcNow) { //Create Azure Credential //This example includes Interactive for development purposes. //For production you should remove interactive since there is no human involved DefaultAzureCredential credential = new(includeInteractiveCredentials: true); TokenRequestContext authContext = new( new string[] { "https://management.core.windows.net/.default" }); _token = await credential.GetTokenAsync(authContext); } return _token.Value.Token; } - Once the token is created,
ezManager.GetAvailableCAsAsync()will call the EZCA api to get the available SSL CAs that that user can request from.HttpResponseMessage response = await _httpService.GetAPIAsync($"{_portalURL}api/CA/GetAvailableSSLCAs", await GetTokenAsync()); - If the call is successful, it will return a list of Available CAs.
Selecting Issuing CA
- If more than one CA is returned, the user is given the choice of selecting the CA, since this is not important for this tutorial, we will skip this section.
Registering Device in EZCA
Once the CA is selected, we have to create a fake DeviceID and register it as a domain for the CA en EZCA. This is all done in the RegisterDomainAsync function.
- First we get the token (this code was covered in a previous section so we will skip it this time around).
- Then we use the token information to get the user requesting the domain. This is done to add the user as a requester and an owner of the domain. In production, we recommend having owners and requesters designated by the security team.
- After we have the owners and requesters list, we create a
NewDomainRegistrationRequestobject, this object will then be send as a post request to EZCA. Below you can see an explanation of each of the fields.public class NewDomainRegistrationRequest { [JsonPropertyName("CAID")] public string? CAID { get; set; } //This is the CA ID used by EZCA to know which CA you are requesting from. We got this value from the CA Information. [JsonPropertyName("TemplateID")] public string? TemplateID { get; set; } // This is another ID Value that allows EZCA to know which CA you are requesting from. We got this value from the CA Information. [JsonPropertyName("Domain")] public string? Domain { get; set; } // In this case the domain is the device ID of the Device [JsonPropertyName("Owners")] public List<AADObjectModel> Owners { get; set; } = new List<AADObjectModel>(); //This are the AAD Objects that are allowed to make changes to this domain. [JsonPropertyName("Requesters")] public List<AADObjectModel> Requesters { get; set; } = new List<AADObjectModel>(); //This are the AAD objects allowed to request certificates for this domain. For this field we recommend keeping it to your enrollment agent only. After the first certificate is issued, your IoT device can use that certificate to renew its certificate. } - Once we have created the
NewDomainRegistrationRequestobject, we send the post request to EZCA.HttpResponseMessage response = await _httpService.PostAPIAsync($"{_portalURL}api/CA/RegisterNewDomain", JsonSerializer.Serialize(request), await GetTokenAsync());
Requesting A Certificate In EZCA
Once the “domain” for this device ID is registered in EZCA, we can go ahead and request the certificate. To create the certificate, we call ezManager.RequestCertificateAsync(selectedCA, deviceID); This function will create a certificate signing request, request the certificate and return the newly created X509 certificate.
- First we create an RSA key.
//create a 4096 RSA key RSA key = RSA.Create(4096); - Then we crete the certificate signing request (CSR) this is used to request a certificate from the CA proving that you are the owner of the private key without sharing the private key with the CA.
//create Certificate Signing Request X500DistinguishedName x500DistinguishedName = new("CN=" + domain); CertificateRequest certificateRequest = new(x500DistinguishedName, key, HashAlgorithmName.SHA256, RSASignaturePadding.Pkcs1); string csr = PemEncodeSigningRequest(certificateRequest); - Then we create a list of subject alternate names, in this case we are only adding the device ID.
List<string> subjectAlternateNames = new() { domain }; - Then we set the certificate lifetime, in this example we are setting it for 10 days, for production you will want to talk to your security team to see what is an acceptable certificate lifetime for your certificates.
int certificateValidityDays = 10; // setting the lifetime of the certificate to 10 days - Once we have all the required information we create a
CertificateCreateRequestModelobject, this object will then be send as a post request to EZCA. Below you can see an explanation of each of the fields.public class CertificateCreateRequestModel { [JsonPropertyName("SubjectName")] public string SubjectName { get; set; } //This is the subject name of the certificate, for this case we set CN=DeviceID where DeviceID is your device ID. This is used by Azure to know which device is calling. [JsonPropertyName("SubjectAltNames")] public List<string> SubjectAltNames { get; set; } = new List<string>(); //This are alternative names for the subject name, this was introduced to have multiple domains in one certificate. Since some authentication standards use subject alternate names for authentication, we add the device ID as a subject alternate name. [JsonPropertyName("CAID")] public string? CAID { get; set; } //This is the CA ID used by EZCA to know which CA you are requesting from. We got this value from the CA Information. [JsonPropertyName("TemplateID")] public string? TemplateID { get; set; } // This is another ID Value that allows EZCA to know which CA you are requesting from. We got this value from the CA Information. [JsonPropertyName("CSR")] public string CSR { get; set; } //this is the signing request we created to prove we own the private key. [JsonPropertyName("ValidityInDays")] public int ValidityInDays { get; set; } //this is the number of days the certificate will be valid [JsonPropertyName("EKUs")] public string[] EKUs { get; set; } = new string[] { "1.3.6.1.5.5.7.3.1", "1.3.6.1.5.5.7.3.2" }; //this is what the certificate can be used for. By default we add Client authentication and Server authentication [JsonPropertyName("KeyUsages")] public string[] KeyUsages { get; set; } = new string[] { "Key Encipherment", "Digital Signature" }; // this is what the certificate's key can be used for. //The following fields are used to give visibility to your administrators how you are using the certificate [JsonPropertyName("SelectedLocation")] public string SelectedLocation { get; set; } = "IoT Device"; // where the device is being stored. [JsonPropertyName("ResourceID")] public string ResourceID { get; set; } = string.Empty; //This is only used when the certificate is being stored in Azure [JsonPropertyName("SecretName")] public string SecretName { get; set; } = string.Empty; //This is only used when the certificate is being stored in Azure [JsonPropertyName("AKVName")] public string AKVName { get; set; } = string.Empty;//This is only used when the certificate is being stored in Azure [JsonPropertyName("AutoRenew")] public bool AutoRenew { get; set; } = false; //This indicates if you want EZCA to automatically renew your certificate. This feature is only available when the certificate is being stored in Azure [JsonPropertyName("AutoRenewPercentage")] public int AutoRenewPercentage { get; set; } = 80; //This feature is only available when the certificate is being stored in Azure } - After we create the
CertificateCreateRequestModelobject we send the certificate request to Azure.//Request Certificate from EZCA HttpResponseMessage response = await _httpService.PostAPIAsync($"{_portalURL}api/CA/RequestSSLCertificate", JsonSerializer.Serialize(request), await GetTokenAsync()); - Once the certificate is created, we return the certificate with it’s private key.
    APIResultModel? result = JsonSerializer.Deserialize<APIResultModel>(await response.Content.ReadAsStringAsync());
    if (result != null)
    {
        if(result.Success)
        {
            X509Certificate2 certificate = ImportCertFromPEMString(result.Message);
            return certificate.CopyWithPrivateKey(key);
        }
    }
Sending Messages to Azure
Now that we have created the certificate, all we have to do is authenticate to Azure and send some messages to test that it is working.
To Authenticate with Azure we will need the Microsoft.Azure.Devices.Client NuGet package.
- First we create a
DeviceAuthenticationWithX509Certificatewith the device ID and the certificate issued for that device.DeviceAuthenticationWithX509Certificate auth = new (deviceID, deviceCertificate); - Then we create a device client using: the IoT Hub endpoint, the authentication object we just created, and the transport type you want to use.
var deviceClient = DeviceClient.Create(_iotHubEndpoint, auth, TransportType.Mqtt); - Once we have created the device client, we can start sending messages to Azure. To do this we use the following code taken from https://docs.microsoft.com/en-us/azure/iot-hub/tutorial-x509-test-certificate
    static async Task SendEventAsync(DeviceClient deviceClient, string deviceId)
    {
        //ref https://docs.microsoft.com/en-us/azure/iot-hub/tutorial-x509-test-certificate
        string dataBuffer;
        int MESSAGE_COUNT = 5;
        Random rnd = new Random();
        float temperature;
        float humidity;
        int TEMPERATURE_THRESHOLD = 30;
        Console.WriteLine("Device sending {0} messages to IoTHub...\n", MESSAGE_COUNT);
        // Iterate MESSAGE_COUNT times to set random temperature and humidity values.
        for (int count = 0; count < MESSAGE_COUNT; count++)
        {
            // Set random values for temperature and humidity.
            temperature = rnd.Next(20, 35);
            humidity = rnd.Next(60, 80);
            dataBuffer = string.Format("{{\"deviceId\":\"{0}\",\"messageId\":{1},\"temperature\":{2},\"humidity\":{3}}}",
                deviceId, count, temperature, humidity);
            Message eventMessage = new Message(Encoding.UTF8.GetBytes(dataBuffer));
            eventMessage.Properties.Add("temperatureAlert",
                (temperature > TEMPERATURE_THRESHOLD) ? "true" : "false");
            Console.WriteLine("\t{0}> Sending message: {1}, Data: [{2}]",
                DateTime.Now.ToLocalTime(), count, dataBuffer);

            // Send to IoT Hub.
            await deviceClient.SendEventAsync(eventMessage);
        }
    }
Next Steps
In this tutorial, we were able to manually connect a device to Azure and send events. While this is great for testing, it cannot scale to the millions of IoT devices that are registered every day. Check our guide Automatically Provision IoT Devices in Azure IoT With a Trusted CA to learn how you can automate all the manual steps on this tutorial.