Register Agent in EZCA
Prerequisites
Introduction
The last step to linking EZCA to your existing ADCS CAs is registering the CA in EZCA.
Registering the CA in EZCA
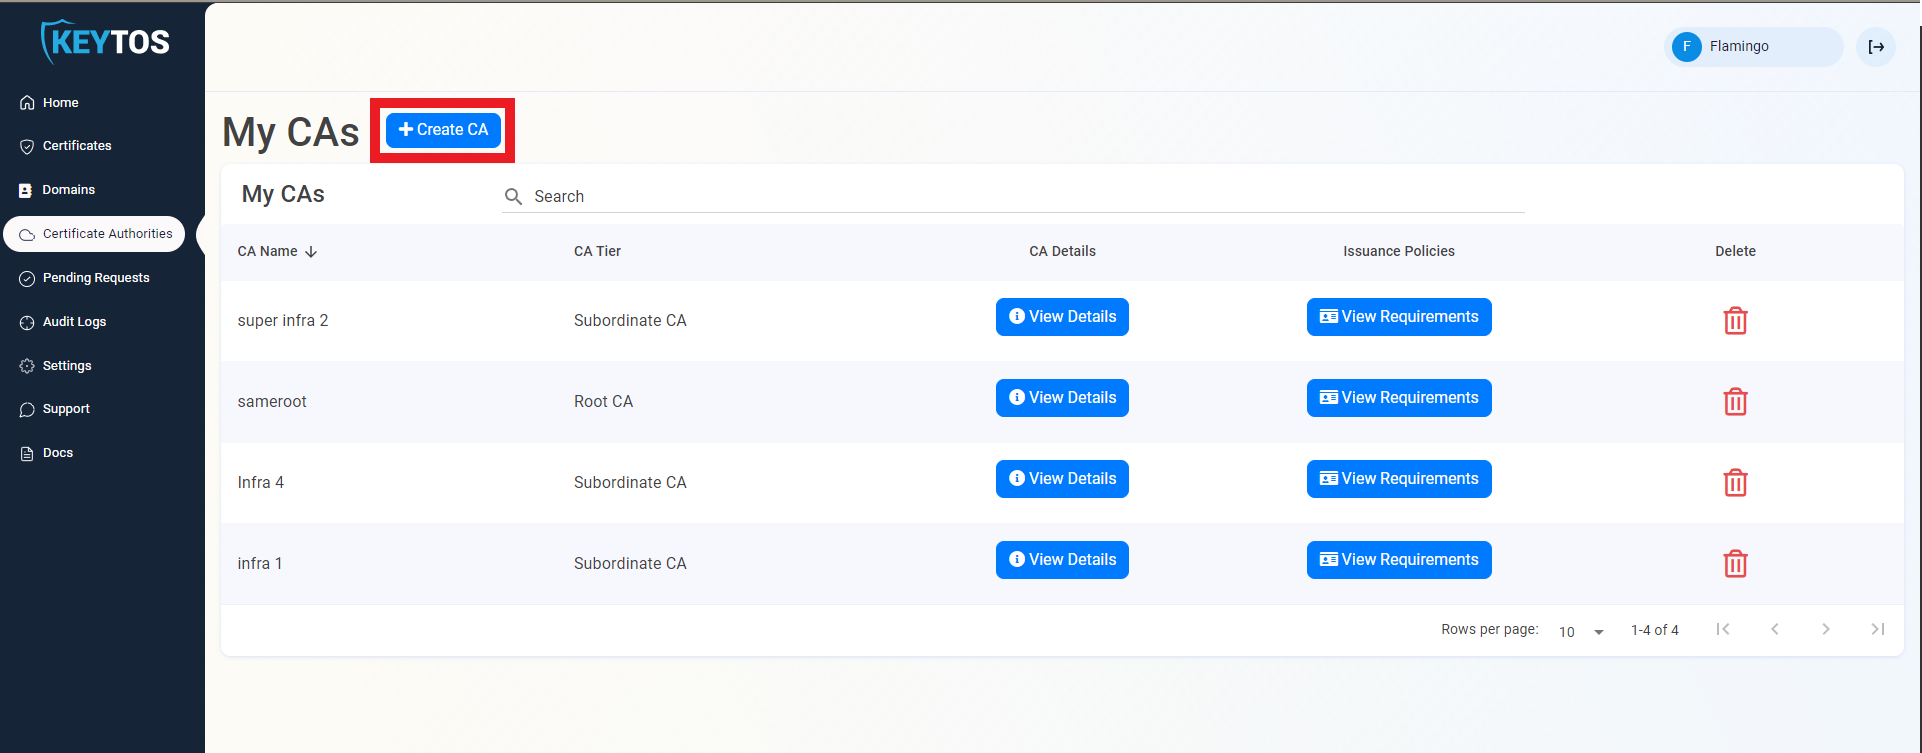
- Navigate to the EZCA portal.
- Navigate to Certificate Authorities.

- Click on the “Create CA”.
- Select ADCS CA.
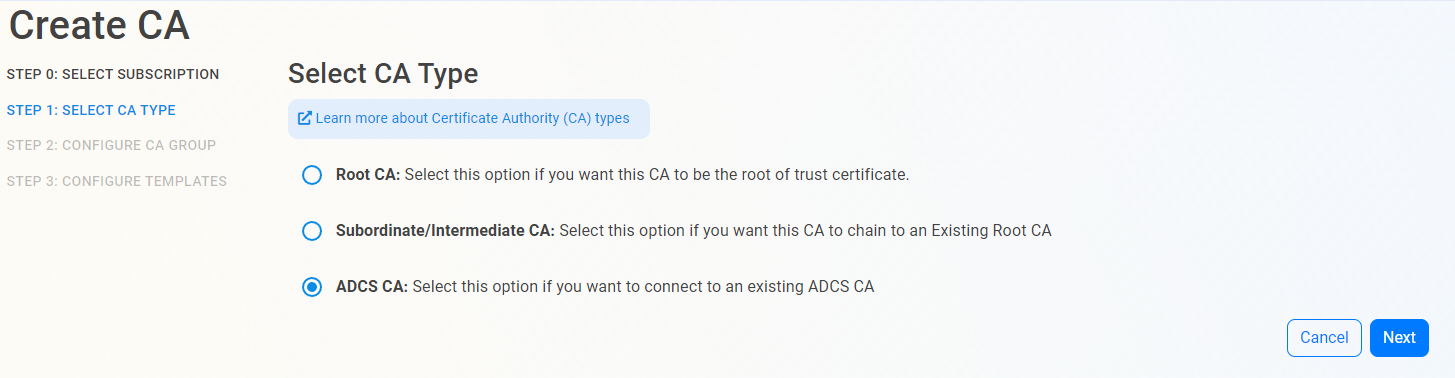
- Press Next.
Connect CAs
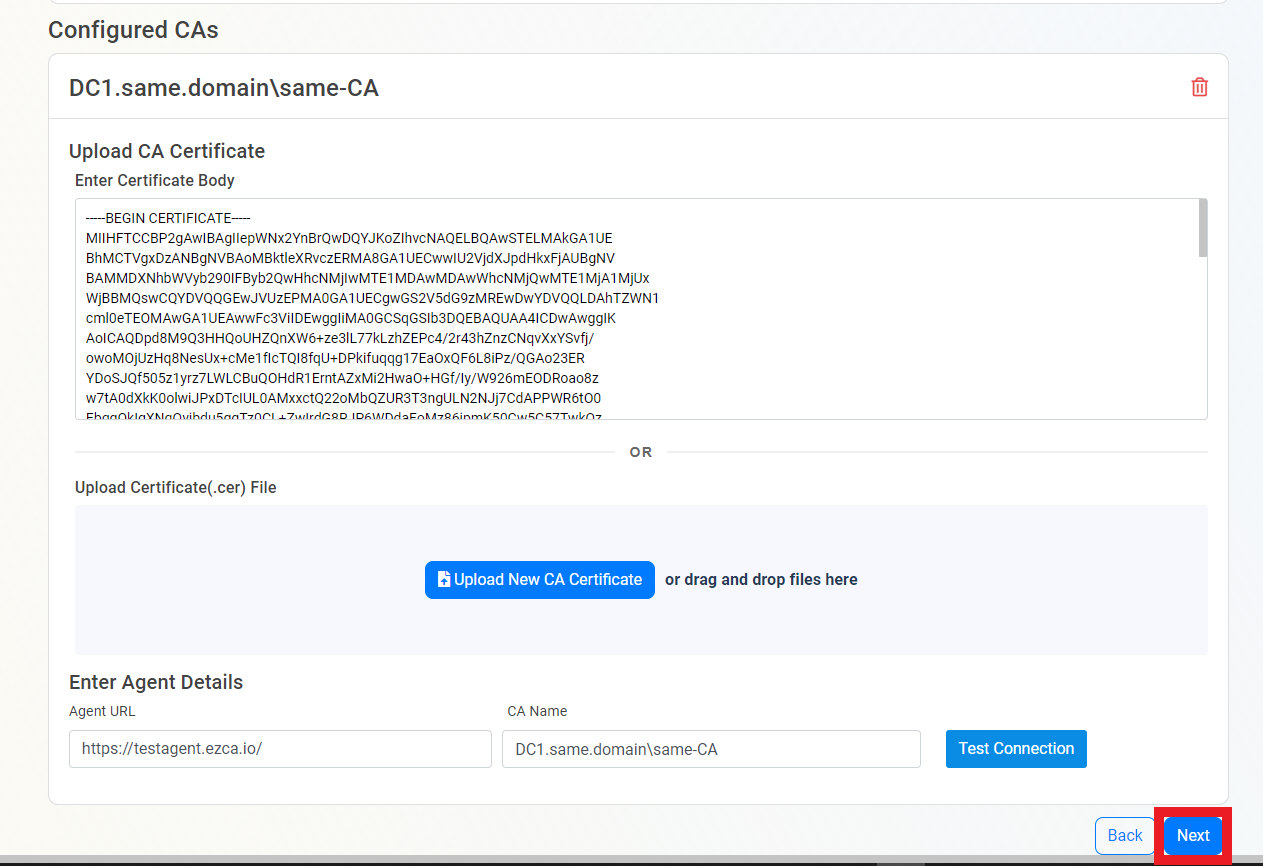
Now we will connect EZCA to all the CAs you want to manage with EZCA.
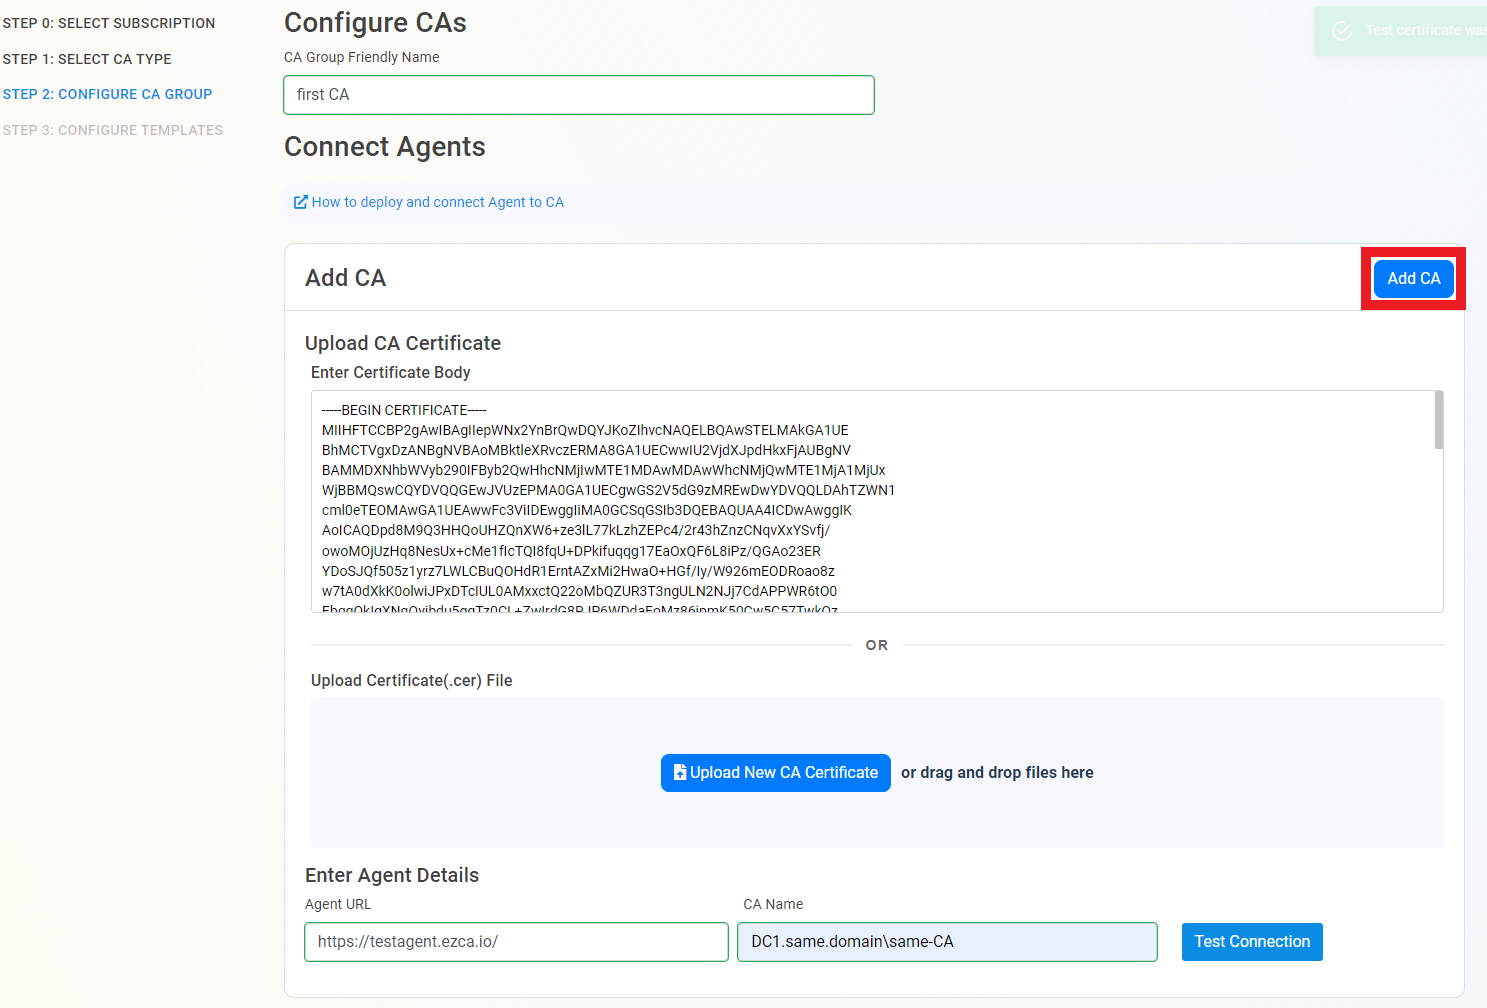
- First, enter the CA Friendly Name. This name is only for your reference in the EZCA portal.
- Upload the CAs certificate (Only the public part. Do not upload the private key).
- Enter the Agent URL.
The Agent URL has to be a valid public facing FQDN with a valid SSL certificate.
- Enter the CA name with the format
HOST.DNS\CA Name. - Press “Test Connection”.
This will create a test certificate in the CA, make sure that CA has the Test Template enabled.

- Once the connection is validated, Press Add CA.
- If you want to add more CAs to this CA group (this will enable you to manage domains and requests as if they are all part of one big geo-redundant CA), repeat steps 2-6 for all CAs.
- Once you are done adding the CAs, press Next.
Adding Templates
Once the CAs are connected to EZCA, we have to add the templates that you want EZCA to manage certificates for.
- First select the template type this will be used for.
- Then enter the template name as it appears in the CA.
- Press Test Template to verify EZCA has access to request certificates for this template.
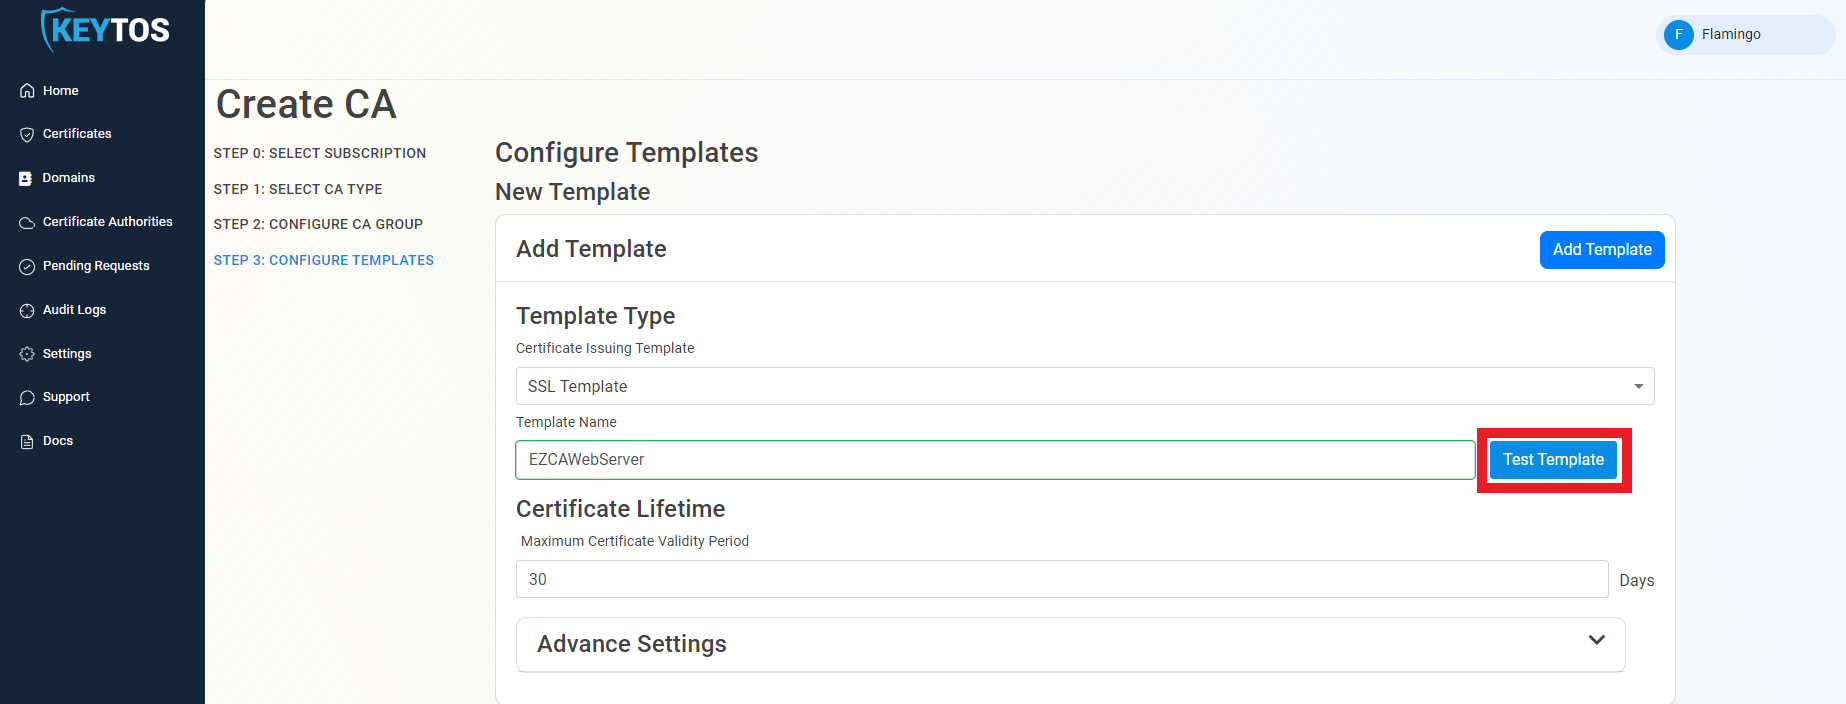
- Enter the maximum lifetime for a certificate that can be issued by EZCA.
- (Optional) EZCA templates have advance settings that can be set such as domain restrictions, require approval or restrict who can request domain registrations. [Read More]
- Press Add template.
- Once you have added and configured all the desired templates, press the create button.
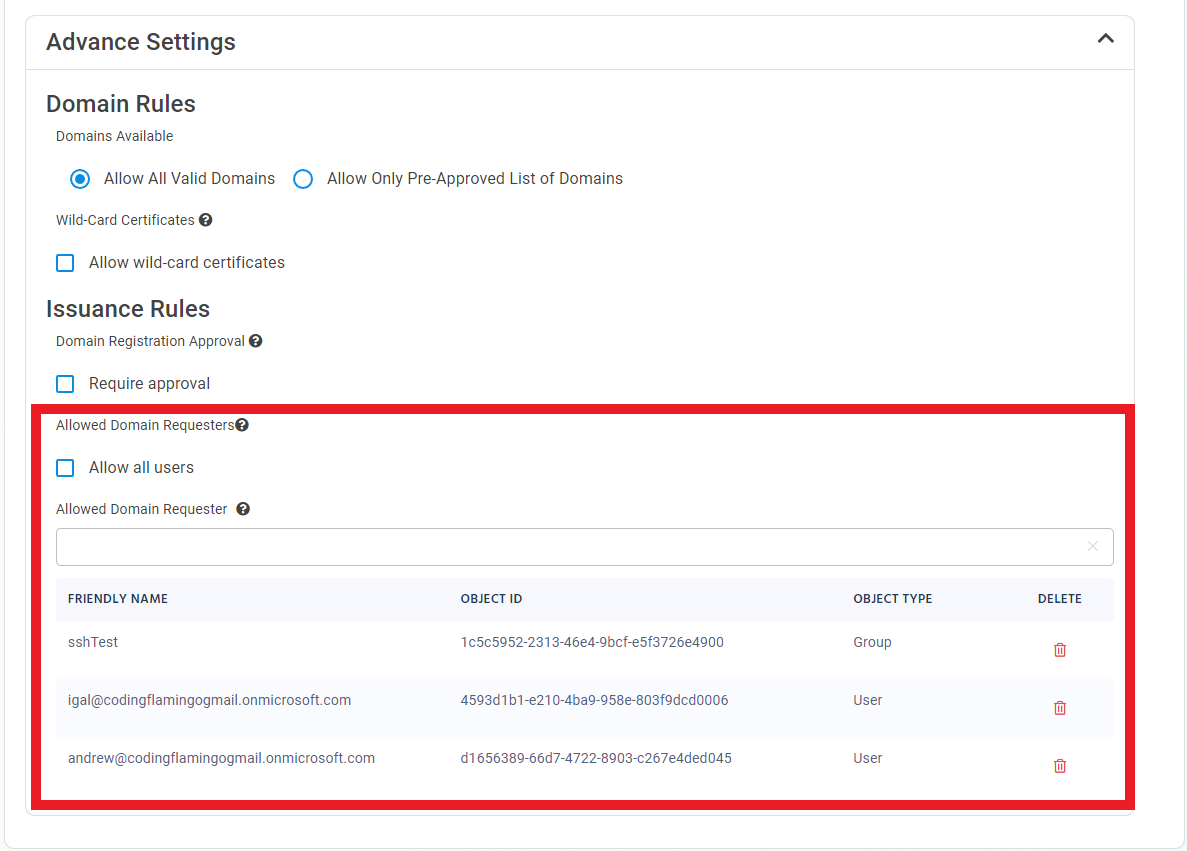
(Optional) Templates (Advanced Settings)
This section gives you grater granularity on who can request. This is not required for most organizations.
- Click the expand button.

Pre-Approved List of domains
- Since this is not a publicly trusted CA, by default EZCA will allow requesters to register any domains. If you want to limit which domains can this CA issue, Select the “Allow Only Pre-Approved List of Domains” option.
- Upload a .txt file with your Pre-Approved domains (one per line), or enter them in the portal.

Allow Wildcard Domains
By default EZCA does not allow users to request certificates with wildcard domains (a domain that starts with *. which allows you to use that same certificate for all other subdomains). If you want EZCA to issue wildcard certificates, select the “Allow wild-card certificates” option.
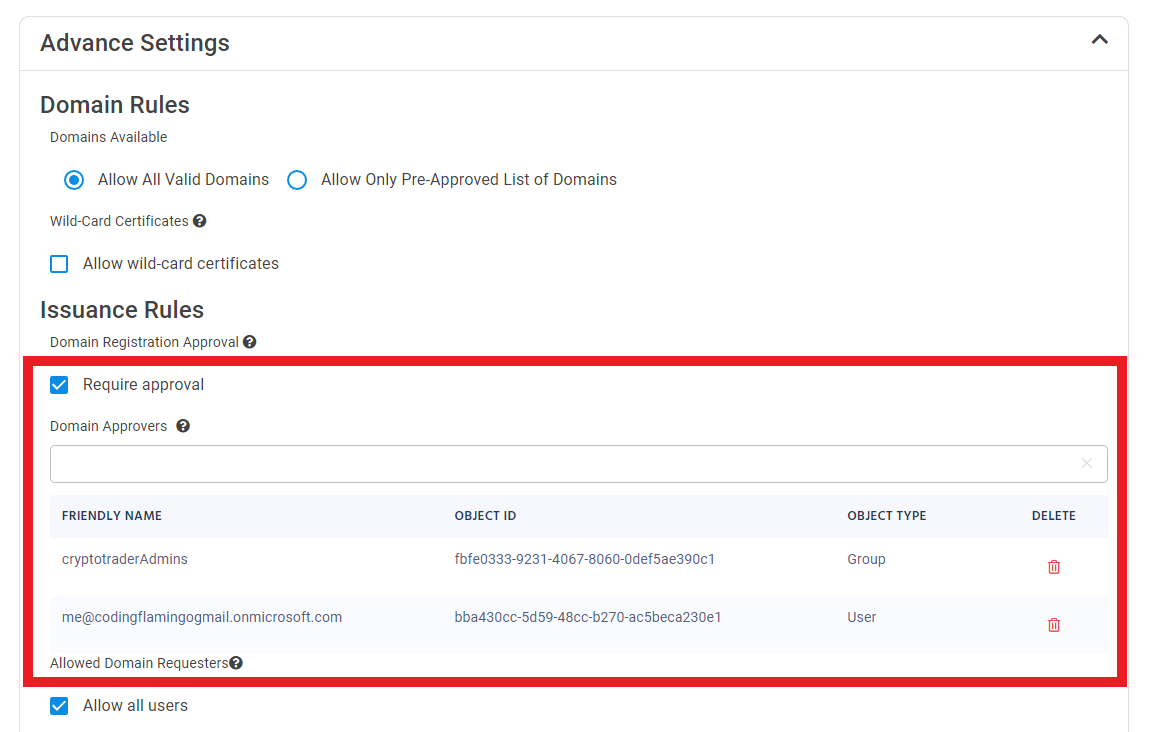
Issuance Rules
To enable more granular control who can request domain ownership in EZCA, we created to extra knobs PKI administrators can adjust to control domain ownership.
- Require domain registration approval. This option enables PKI administrators to set a group of approvers that must approve each domain registration before a user or group of users are registered as domain owners.
- To enable this option select the “require approval” option.
- Enter the users or AAD groups that can approve domain requests.
- The second way PKI administrators can control the registration of domains is to only allow specific users to request domains. This option enables PKI administrators to set a list of users that can request domains for this CA.
- To enable this option deselect the “Allow all users” option.
- Enter the users or AAD groups that can register domains.